Monday, November 14, 2022

Christmas cheer….a little early

​Christmas already?   I walk through the stores and I shake my head at how early Christmas stuff arrives on the shelves.    It was out well before Halloween this year!   What happened to celebrating one holiday at a time?   But even while I shook my head in disgust and mockery at the super early arrival of Christmas, I myself turned my thoughts to the upcoming. Christmas holiday.


I pulled out my fabric bin and picked out some fabric.   Specifically, I picked out the Christmas Fabrics.  It was time for some Christmas quilts, miniature style.


The first one I was on with, but decided it was too much red and it messed up any cohesive pattern of the quilt.  


But no worries!  I had more fabric!   I love the second miniature quilt that I made!   Ironically enough it was the exact same pattern layout as the first quilt, I just changed out some colors and it made it much nicer!!!


And then just because, I did a simple patchwork miniature quilt.  I was happy with this one also. 


Did I have any reason to make these quilts?  Absolutely not!  I just like making quilts.   They will probably end up on Etsy or Facebook Marketplace….because while I like them and hate to give up my creations, I can’t keep everything can I?  


Monday, November 7, 2022

A paper crafted Outhouse 1:12 Scale

 Ok, actually I must NOT use the outhouse.  I actually hate to use them in real life.  But boy did I have fun making this outhouse!  This outhouse was a bit of a whim but also a wee bit planned in nature for a bigger project.

I had purchased some cat food and liked the size box that it came in.  It screamed perfect size for....an outhouse and it even had a door!   I was ready to roll!


I separated the front flap of the box from the main area and shored it all up with some masking tape. 
I cut a triangular piece and attached it to my box so that I would have a nice little peak and a small slope on my outhouse. 
I made sure that my front section with the door would work.

I decided to create my siding out of paper bags.  


I didn't grab many/any pictures.  But I cut the paper bags into flat sections and then I painted the paper a darker brown.   I grabbed my black paint and lightly brushed lines randomly to imitate the look of a wood grain.  I also made small '2x4's' to frame up the inside.  I painted them the same way. 

It was then time to glue the paper bag/siding into place.  I used glue sticks.  Nothing fancy!


I affixed my framing into place.

It was then time to make the wooden throne.  Of course I used cardboard.  In fact, I used some of the leftover pieces of cardboard from the same box.   I also decided that I wanted to have an adult sized throne and a kiddie sized hole.  So I made it two tiered.
I covered it with the same paper and glued it into place. 

Making sure to add actual 'holes' to make it look more real. 


I added a black painted half moon above the door and voila....an outhouse!

I didn't take pictures, but I used more cardboard to make a roof.  I covered the roof with aluminum foil and added a light coat of brown paint to the top of the foil to make the roof look old and rusy.  

I love my wee little dollhouse.   I have plans for a lantern and maybe even an old magazine (Sears and Robuck to keep with the historical feel).   I do have plans for where this outhouse will be residing.  It is for a larger project that I will be sharing very soon!  Until then...enjoy my paper outhouse!


Monday, October 31, 2022

What a Year

How did a year pass by with me not writing anything here about my miniature adventures!  I actually have been working on miniatures, so it's not as if I have been totally out of the loop!  Honestly, life just got busy and I was having to 'chose my battles'.

So, what has kept me busy?  Major changes in my life!  

First of all Jason and I got married in October of 2021!  I even bought a few miniatures on our honeymoon!


I had worked hard before our wedding to complete some miniature quilts for a fall swap. I was super happy with how they turned out! (I also participated in a Christmas swap in 2021)


In early 2022 we began the hunt for a house.  We settled on our house on May 13, 2022.   But even in the midst of searching and packing, I was working on a a few items for a larger scene. (more on that to come).

I spent hours carefully packing all of my dollhouses and moving them!   Ohh and we moved also!   Shortly after our move my mom had a stroke and that has kept me busy.   But I still took the time to work on a dollhouse scene.  I am doing the porch scene from miniaures.com for the creatin' contest.  I have had so much fun with it and honestly love the 'deadline' because it keeps me from just saying, "I want to but I've got so much happening, I'll just do work on it tomorrow."   

In conjunction with the contest miniature (which I will share someday soon), I have been working on throw quilts for a winter swap!


And of course I have had so much fun creating the quilts for my swap that I had to start working on some Christmas miniature quilts!  


I have also decided to finally do it.  I am working on setting up an Etsy shop for miniature quilts.  I do love to make tiny quilts and have no outlet and that is what holds me back from making them.  So maybe I will create myself a wee little outlet for my miniature quilts!    (more on the Etsy Shop to come...but right now it is slated to be Maryfrans Mini Muse.)

Bring on the miniatures!!

Tuesday, May 18, 2021

The yard and porch of the 1920’s House

I am totally kicking it into high gear on the house that is destined to be set in the 1920’s.   I have started work and I’m hot on the trail.  Ok, maybe that makes me sound more ambitious than I am.  High gear implies that I’m working fast and furious.  That is not the case.  I am slow and not even steady.  I work when I can find a spare moment.....a spare moment that allows me the opportunity to actually pull the supplies needed for whatever project out of the closet and into the living room where I work on a TV tray/table.  Not exactly the best workroom, but it’s what I have!

As soon as I got this house I knew it was going to be done in a 1920’s theme.  I also immediately knew that I needed the outside to be completed before I focused on the inside.  I can honestly say that I am done with the outside.  Or at least done enough with the outside.  (I still have a few random ideas for the outside).  

When I brought the house home I immediately spent some time painting and doing some basic repairs. But then the dollhouse sat for a while.  But then I knew it was time to get to work.

The first order of business for the dollhouse was to get it securely attached to a base.  I used a simple piece of plywood.   That left me a space for a yard.   I bought some squares of grass and attached that.   I used my standard egg carton stone work for the foundation and for a flagstone walkway.  I had pictures on my old phone...but that phone was lost during a wild morel mushroom hunting Expedition in the woods (ok it wasn’t all that wild...it just fell out of my pocket and since we were way off trail it was impossible to find since we had been traipsing off trail for more than 3 hours before I realized it was missing!)


I had purchased a small bike.  I was hoping it would look more like a high wheel bicycle...but it is more like a tricycle in size.  I am still pondering how to make a high wheel bike!     I also had a croquette set and a small dog house that I thought would look fun in the yard.

I knew that the porch need some items.  I had found some chairs at a Dollar General.  They were solid white, but I figured I could add some green trim to the chair and put it on the front porch.   I also knew that I wanted to have a milkman’s box.  That was an easy build!!!!

A house with all these ledges just screams for a birds nest.  So I made a birds nest...or two!

As I said, the outside is not totally done.  BUT, it is done enough that I felt comfortable actually turning the dollhouse around so that I can finally turn my attention to the inside!


Wednesday, May 12, 2021

Insomnia Dreams

 It is some unholy hour of the night. Man and beast should be asleep! Yet I find myself wide awake....a frequent occurrence of late. I honestly try to go back to sleep and sometimes it works...but sometimes it doesn’t. And tonight is a ‘doesn’t work’ night. As I laid in bed trying to go to sleep....for HOURS, I found myself thinking of plans for my dollhouses! Ohhh those plans! Let me share them!


I started with plans and ideas for my dollhouse that I am renovating and completing in a 1920’s theme.. I am currently finishing up the front of the dollhouse and know that I will want to actually see the rooms again before I make my final plans for how each room will be renovated and decorated and even what each room will be used for. Without that access, my dreaming turned to other things. But no worries...it was still about miniatures!


I thought about my fun little experiences working on building a dollhouse for my dollhouse. And the follow up recreation of the house I lived in while living in Florida also on 1/144 scale. I thought about my lingering desire to recreate all of the houses that I have lived in over the years. A tiny village so to speak. . That only took a few minutes of my many hours of laying in bed wide awake...so off I went to my next Project in my insomnia planning session!

About a year or so ago, I was contemplating finishing the Greenleaf MckinleyDollhouse and starting my next project and I knew what that project was going to be! It all started when I bought a vintage style table for my 1950’s items for that McKinley Dollhouse. The table was too big for the kitchen but I love the 50’s...so what better to do...I will build a Diner! I started to lay out plans in my mind and on paper. I was going to build myself a diner as my next dollhouse project! Of course I ended up getting the ‘1920’s’ house....so the diner got pushed aside. But in my insomnia trying to sleep moments...I thought about those diner plans! Should I do that next?

Thinking about the diner plans brought me to another planned project. A few weeks ago, Jason and I had been talking about the Chesapeake and Ohio canal. And I off handed my remarked that I had always wanted to build a canal boat dollhouse. Why yes! That will be my next project I declared! Over the last few weeks I have collected. pictures, researched dimensions and generated different ideas. I contemplated a slight problem. A canal boat was 90 feet long. That is a 7.5 foot long project in 1/12 scale. No other option really. I will have to step out of my comfort zone of modeling in 1/12 scale and model the canal boat in 1/24 scale. Something new and unique for me! I have just been waiting until I get at least one more dollhouse to a state of completion. And I’m close...so close to saying that the 1950’s era Greenleaf Mckknley is done! The Stone house quilt shop isn’t too far behind! The 1920’s house though is ages away from being finished!

But here is where insomnia is dangerous. Up until that point I had been just reviewing my preexisting plans... it it soon took a whole new twist! Because in my thoughts about the 1920’s house and wanting to do a library...I realized that I want to do a double decker library...with ladders on little rails that slide to allow access to the upper shelves of books. That isn’t going to work in my 1920’s house though! (Although I contemplated removing a floor to make it work!). So maybe...just maybe ...wait! I will do a room box library!

Somehow the room box library turned into a complete antebellum 1800’s mansion. Double floored open library....conservatory/greenhouse, the music room I have always wanted, and a ballroom...yes a ball room! Oh the plans were going crazy! How to fit this all into one house! I laid in bed for hours as these thoughts and ideas floated into my head and I tried to work out the logistics.

*I need a floor plan! I want the house to be ‘real’. So I picked up my phone and researched vintage mansion floor plans and eventually the floor plan and how to implement it so I can see all the rooms came together (it will be viewed from the sides and the front.
*Pocket doors! It will need pocket doors! How can I build pocket doors!
*I want to build it in stages. One room box at a time...is it possible...what are the logistics. Can I manage to build it one room at a time?
*holy cow this plan is going to be huge! I have to build it so that it can be taken apart to be moved! That adds a whole new level. Well I wanted to build it in sections anyway..I just have to figure out how to only temporarily attach them together. Should I drop the scale...1/24 scale. Hmmmm. I would rather stick with 1/12, but I may have to.

I’m telling you, my mind went crazy! I am so excited about this idea Of a project that is way off down the road. Seriously. I have NO SPACE for anything like this. But, that isn’t going to keep me from dreaming...and it won’t keep me from planning. I brought out my notebook....time to lay out these floor plans that are floating in my head!!!

Monday, April 12, 2021

Radiators

I decided that to make my Greenleaf McKinley dollhouse a real home versus simply a house, that I needed to add a good old fashioned radiator....or two...or 8.  You know the kind.   The good old fashioned hot water radiant heaters that were so warm and toasty on a cold day!   The place to deal your towel whilst in the bath....and to have a deliciously warm towel.  Ohhh the memories of the smell of drying gloves as they dried atop those warm hunks of metal. 

My dollhouse needs radiators!  So I set to work!!!

I decided to use popsicle sticks (craft sticks).  I started to simple cut and eyeball the measurements I make a prototype.   Once I had the basic idea I had the base pieces I would need to make a radiator.  The number of pieces would be determined by how long I wanted the radiator to be.  

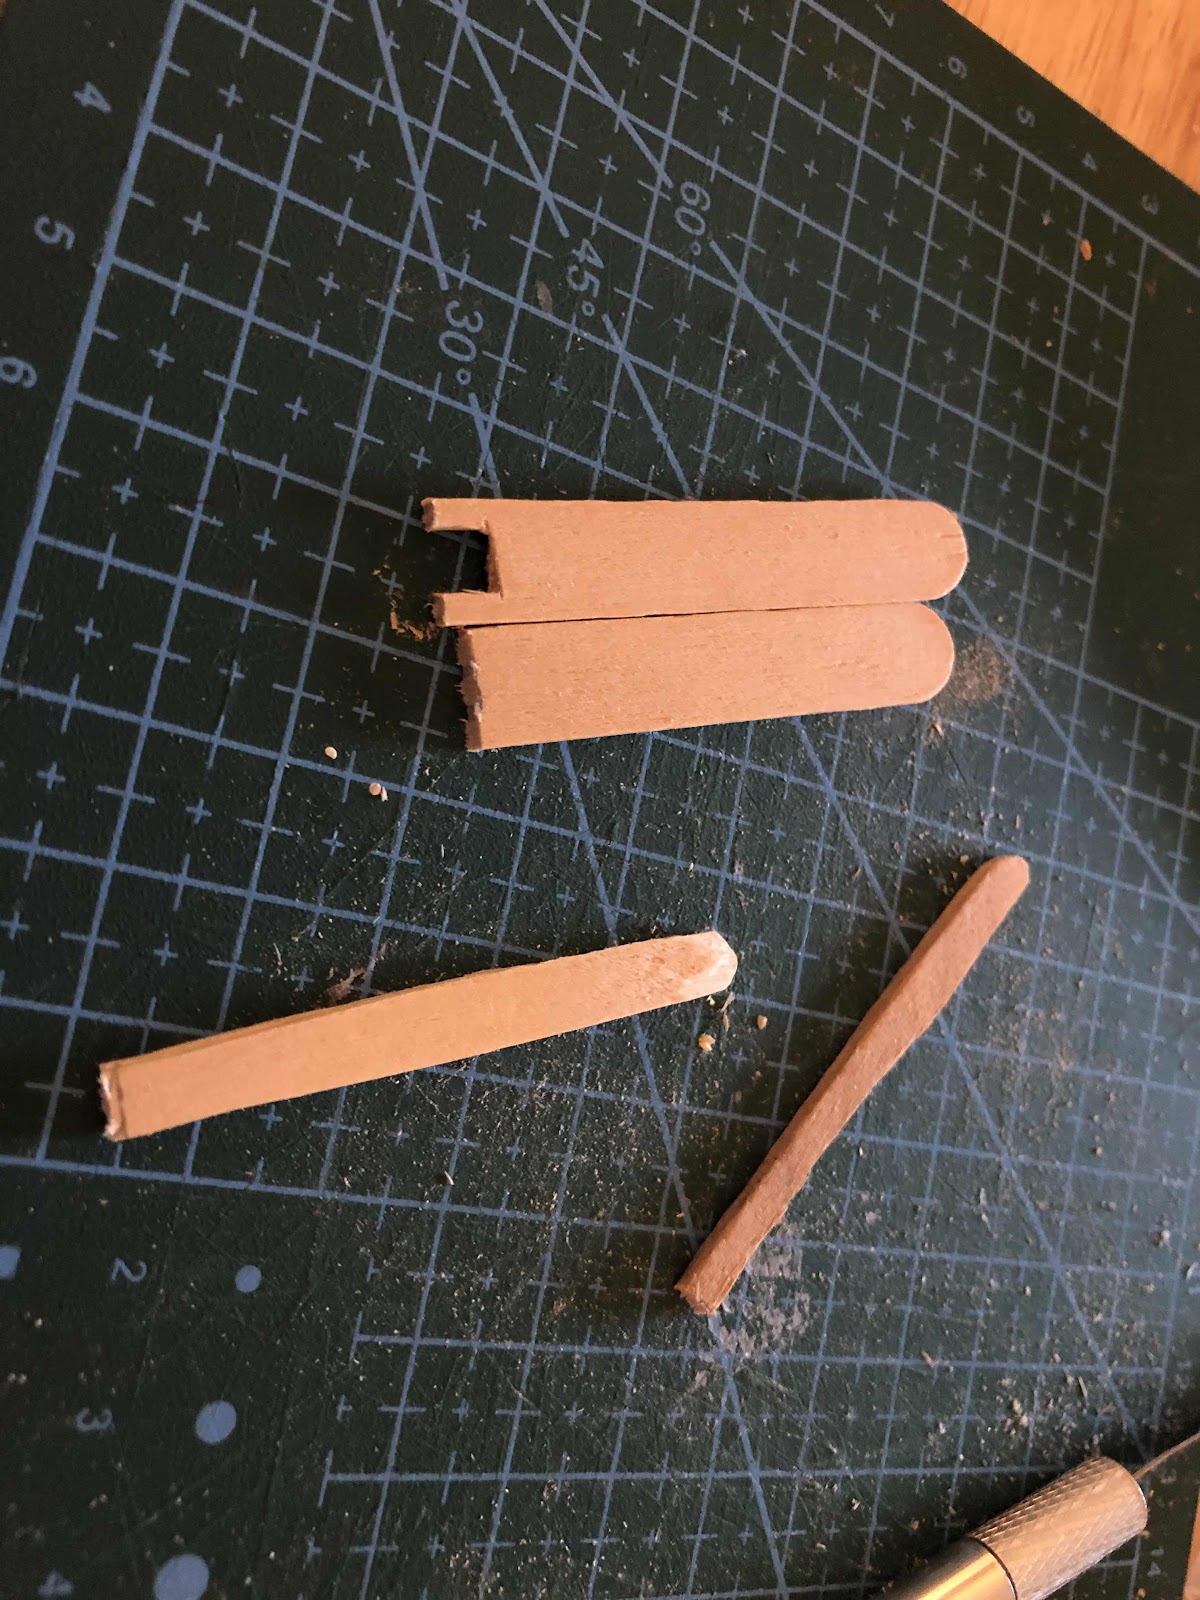
The most annoying piece to work on was the two end pieces for each radiator as I pretty much carved two legs.  Not really difficult...just time consuming. 
The end pieces I literally eyeballed the height and then checked how it looked in the actual dollhouse!  
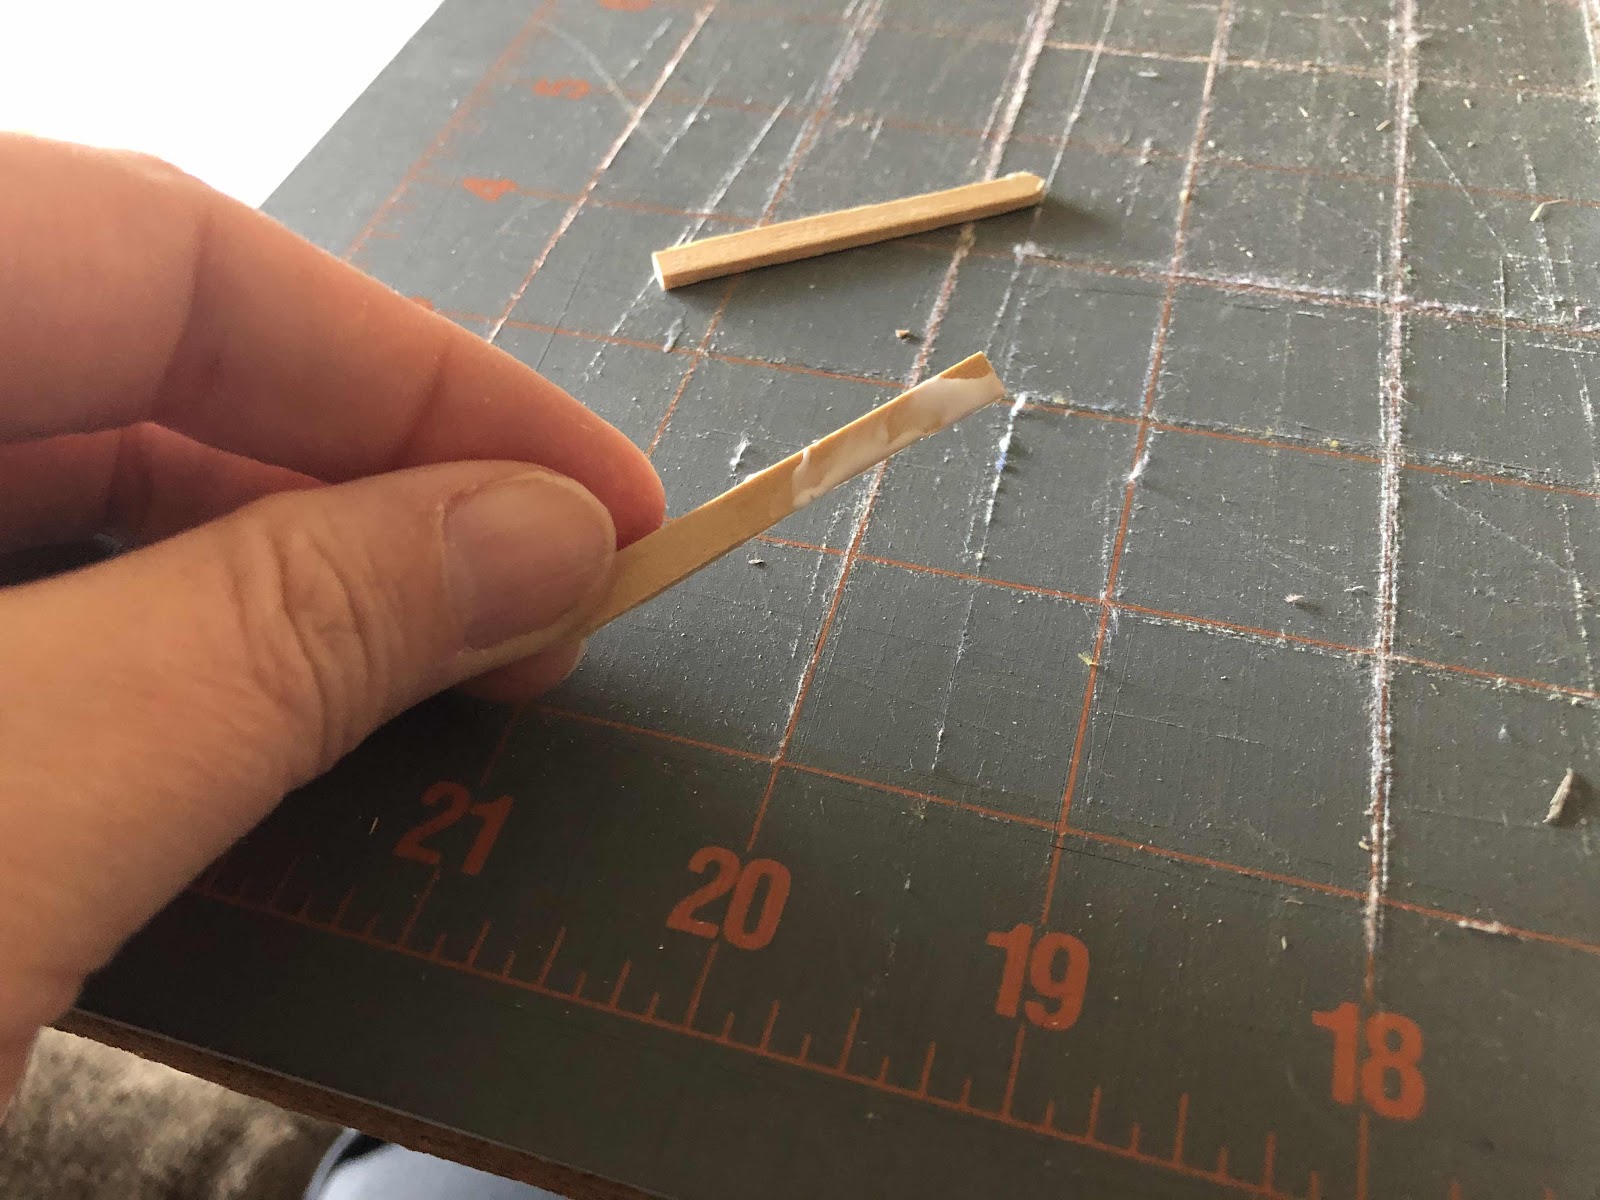
Once I had my end pieces cut I knew exactly how long to cut the middle portion of the radiators.  They needed to be just a tad shorter....I took the length of the end piece and subtracted the measurements for the legs and I had the perfect size.   I then took some of those pieces and cut them down the middle to create narrow pieces.   I also took the time to round over the tops of the narrow pieces by cutting them a bit and sanding them a lot.   How many did I cut?   Well that depends on how long you want your radiator to be.  

I decided to mass produce my radiators so I just sat down with my exacto knives and small miter saw and started cutting.  Finally I had enough pieces cut and I was ready to start the assembly process.

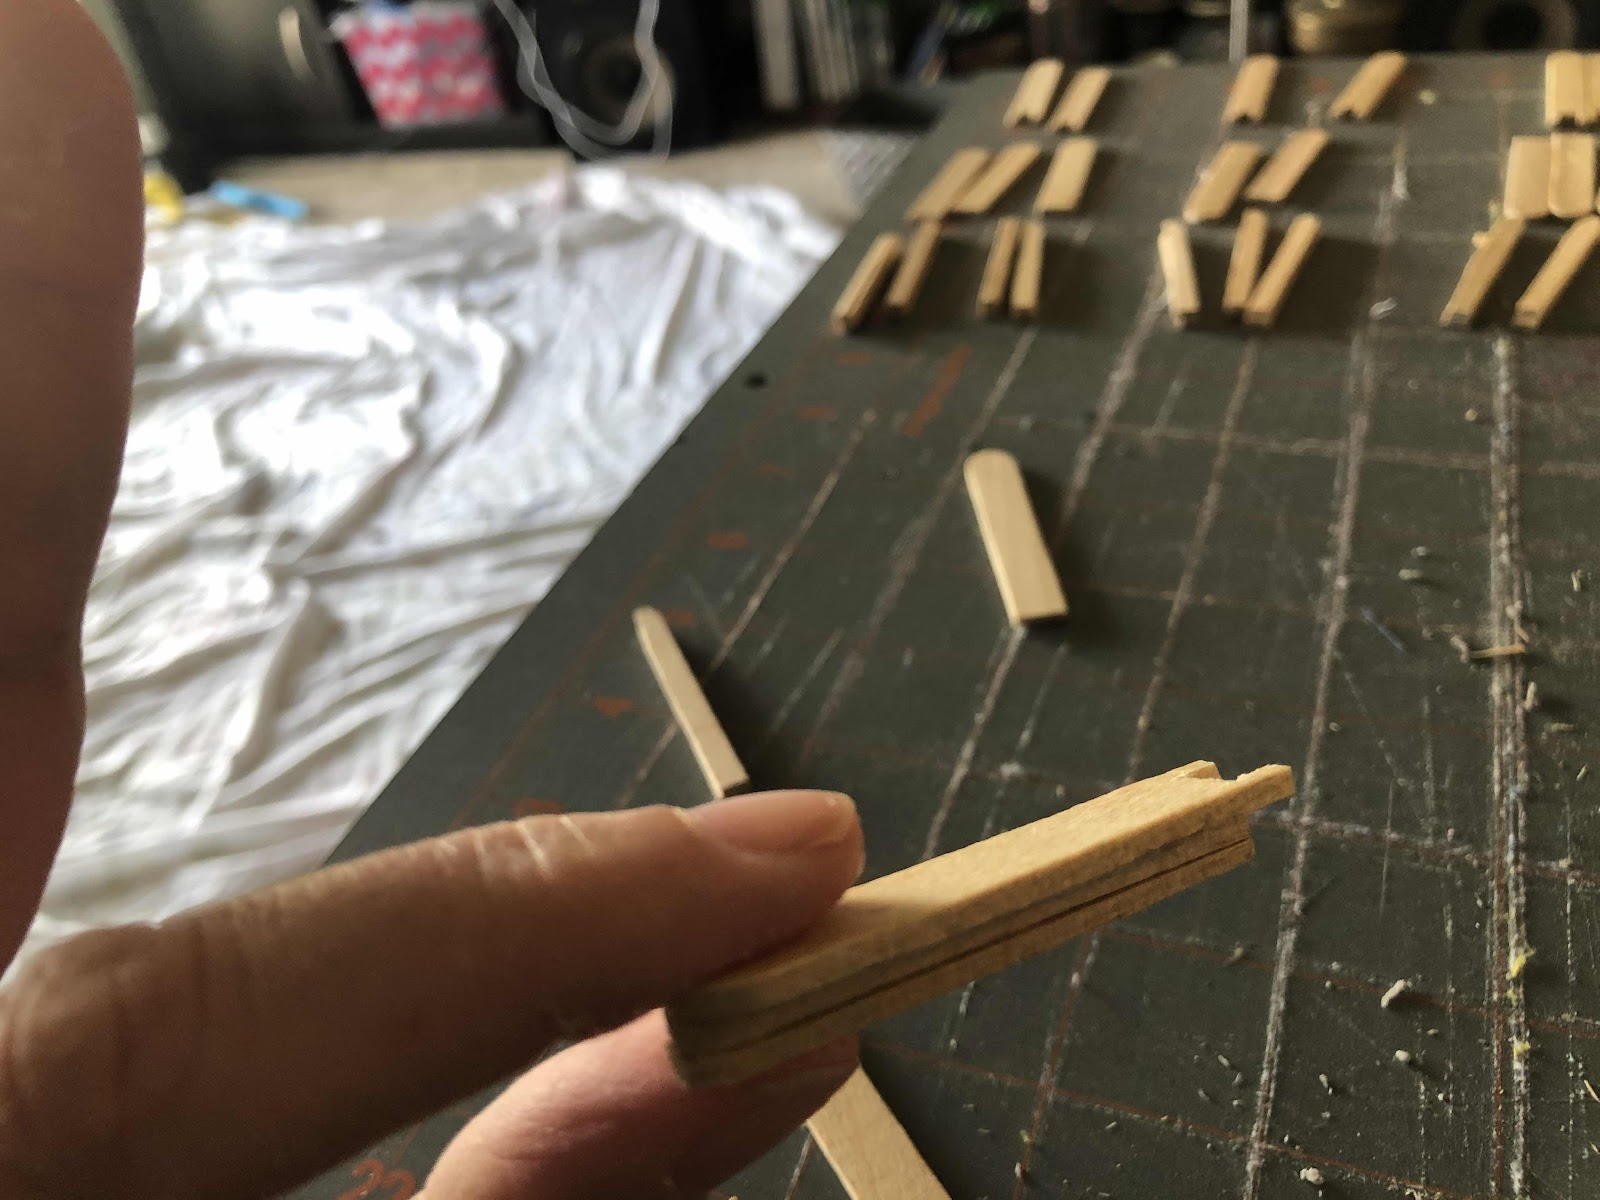
As you can see above I used the three basic pieces that I described earlier.  The two end pieces for each radiator (the ones with legs) the wide internal pieces and the small narrow  pieces. 

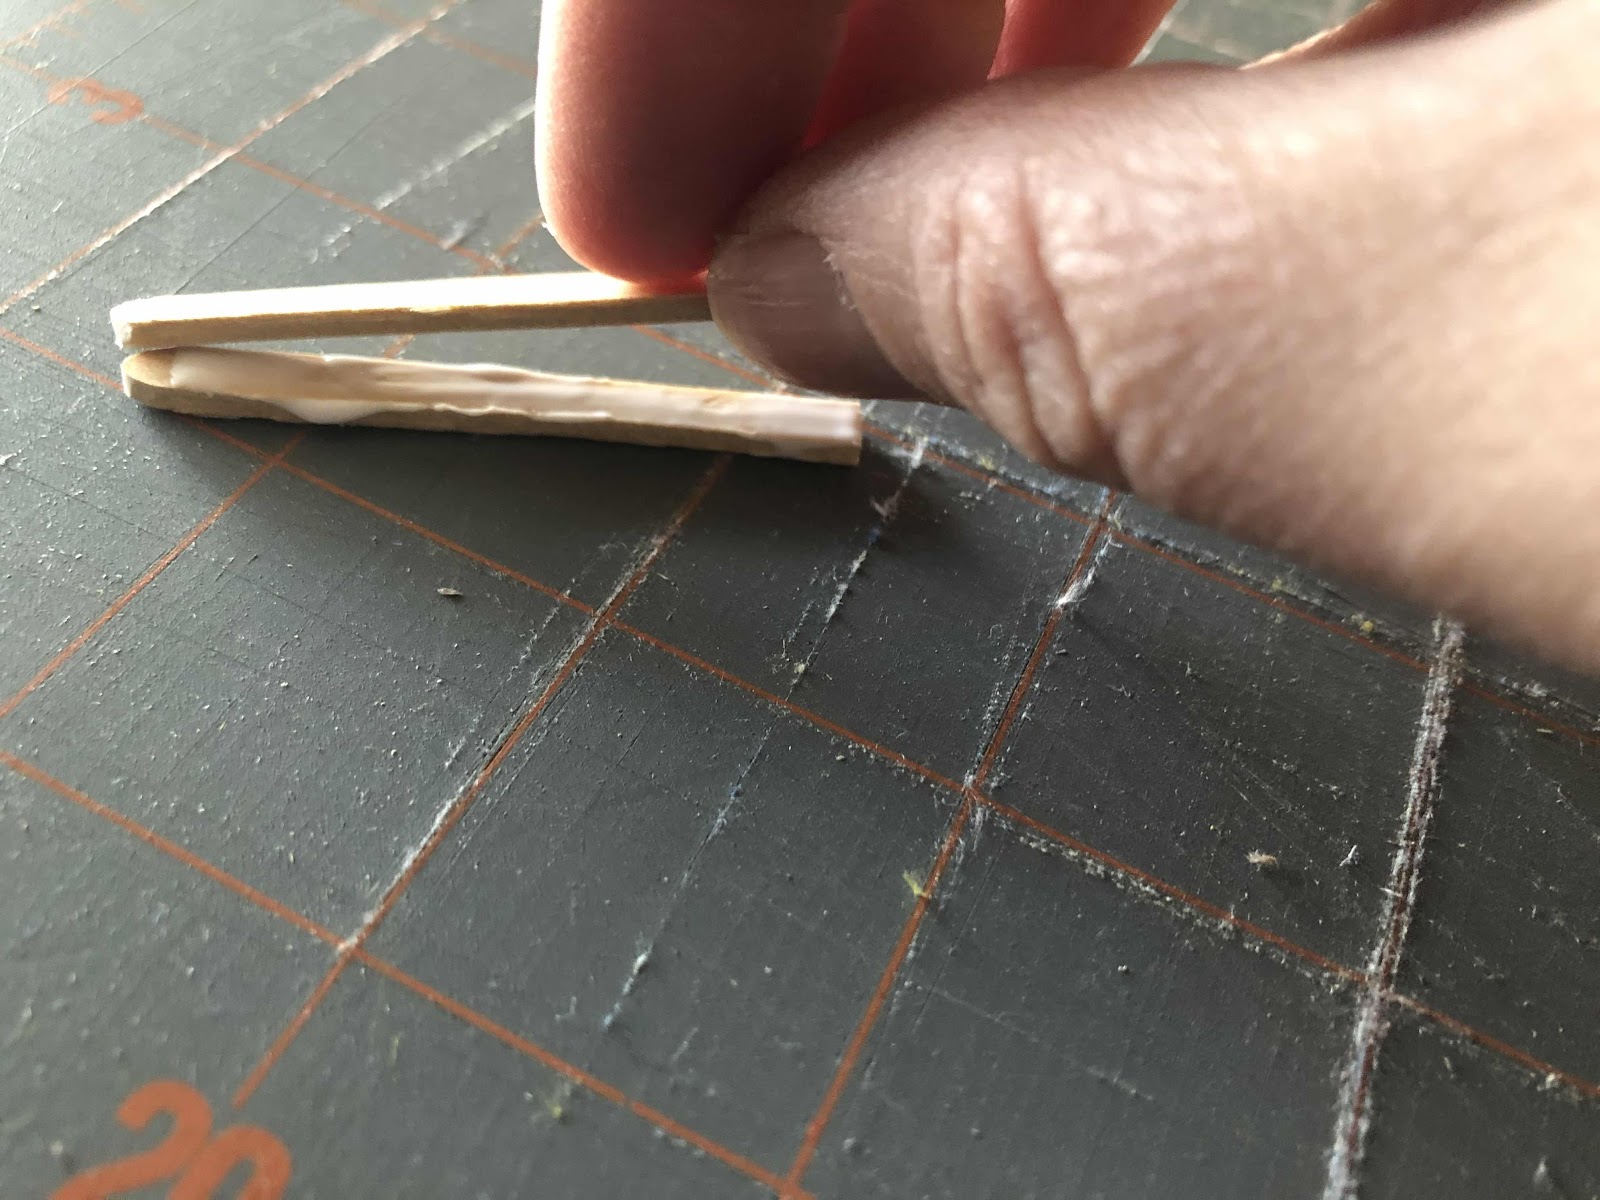
I started by taking my small narrow pieces and gluing two together.  I needed theses pieces to be a bit thicker. 


I walked away from my radiators to allow these pieces to fully dry.  But it wasn’t long before I came back ready to assemble my radiators.

I picked up one of the end pieces of a radiator (the piece with the two legs/feet) and I glued one of my narrow pieces to it (the pieces that I glued together to make a thicker piece). 

I then grabbed a wide piece (one with no legs) and glued that to the narrow piece that I had just added. 

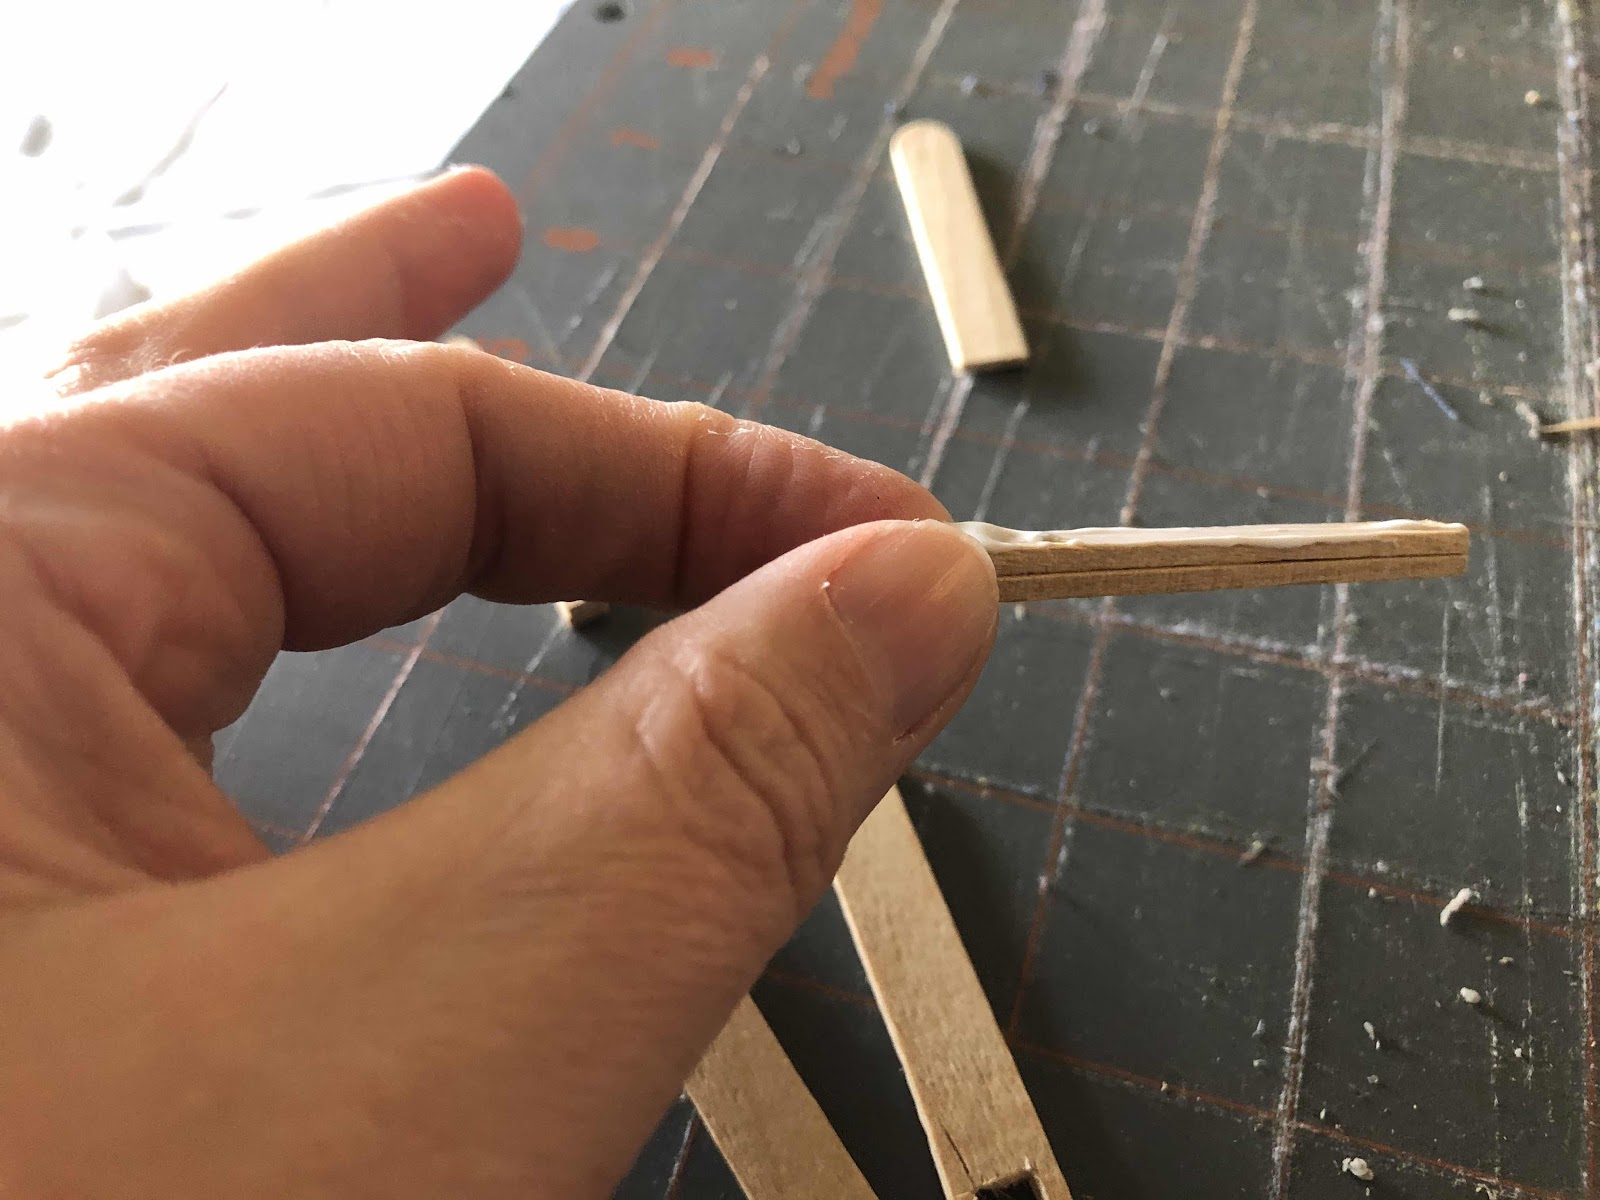
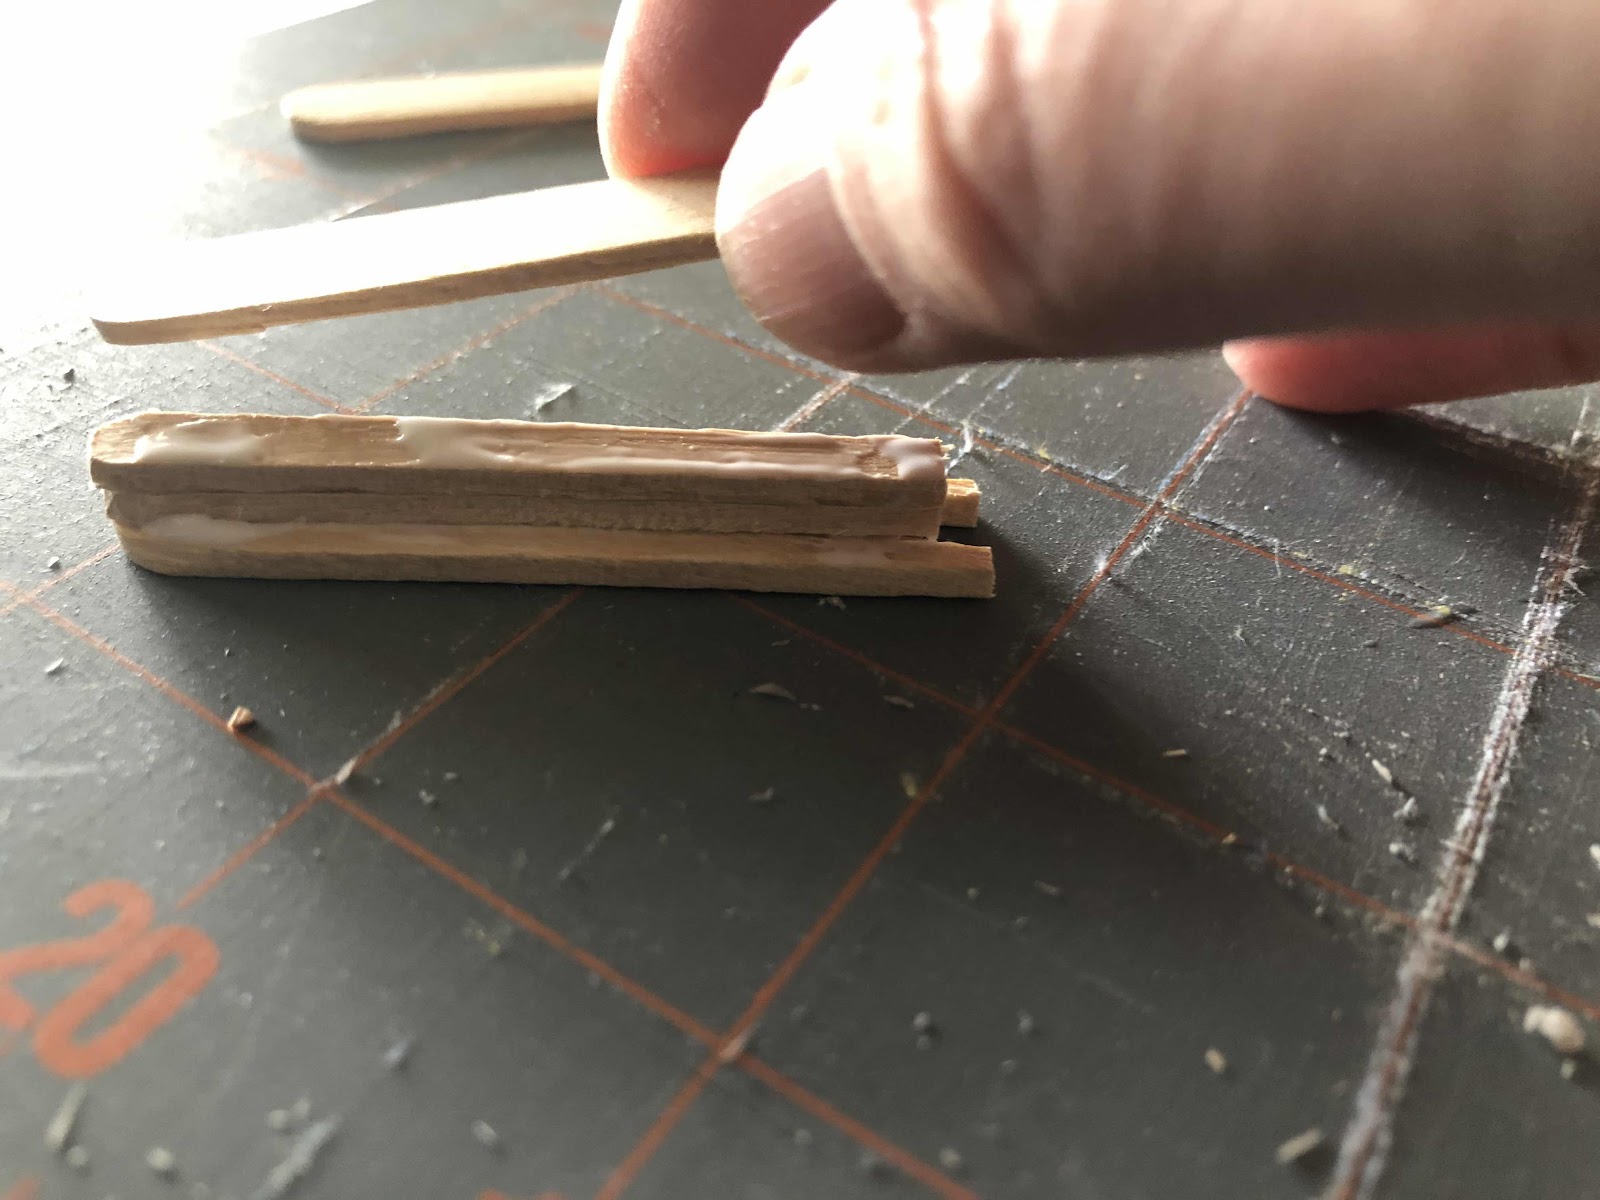
And now you repeat the process by gluing another narrow piece on top of that wide piece.   Be sure to keep everything even at the top.


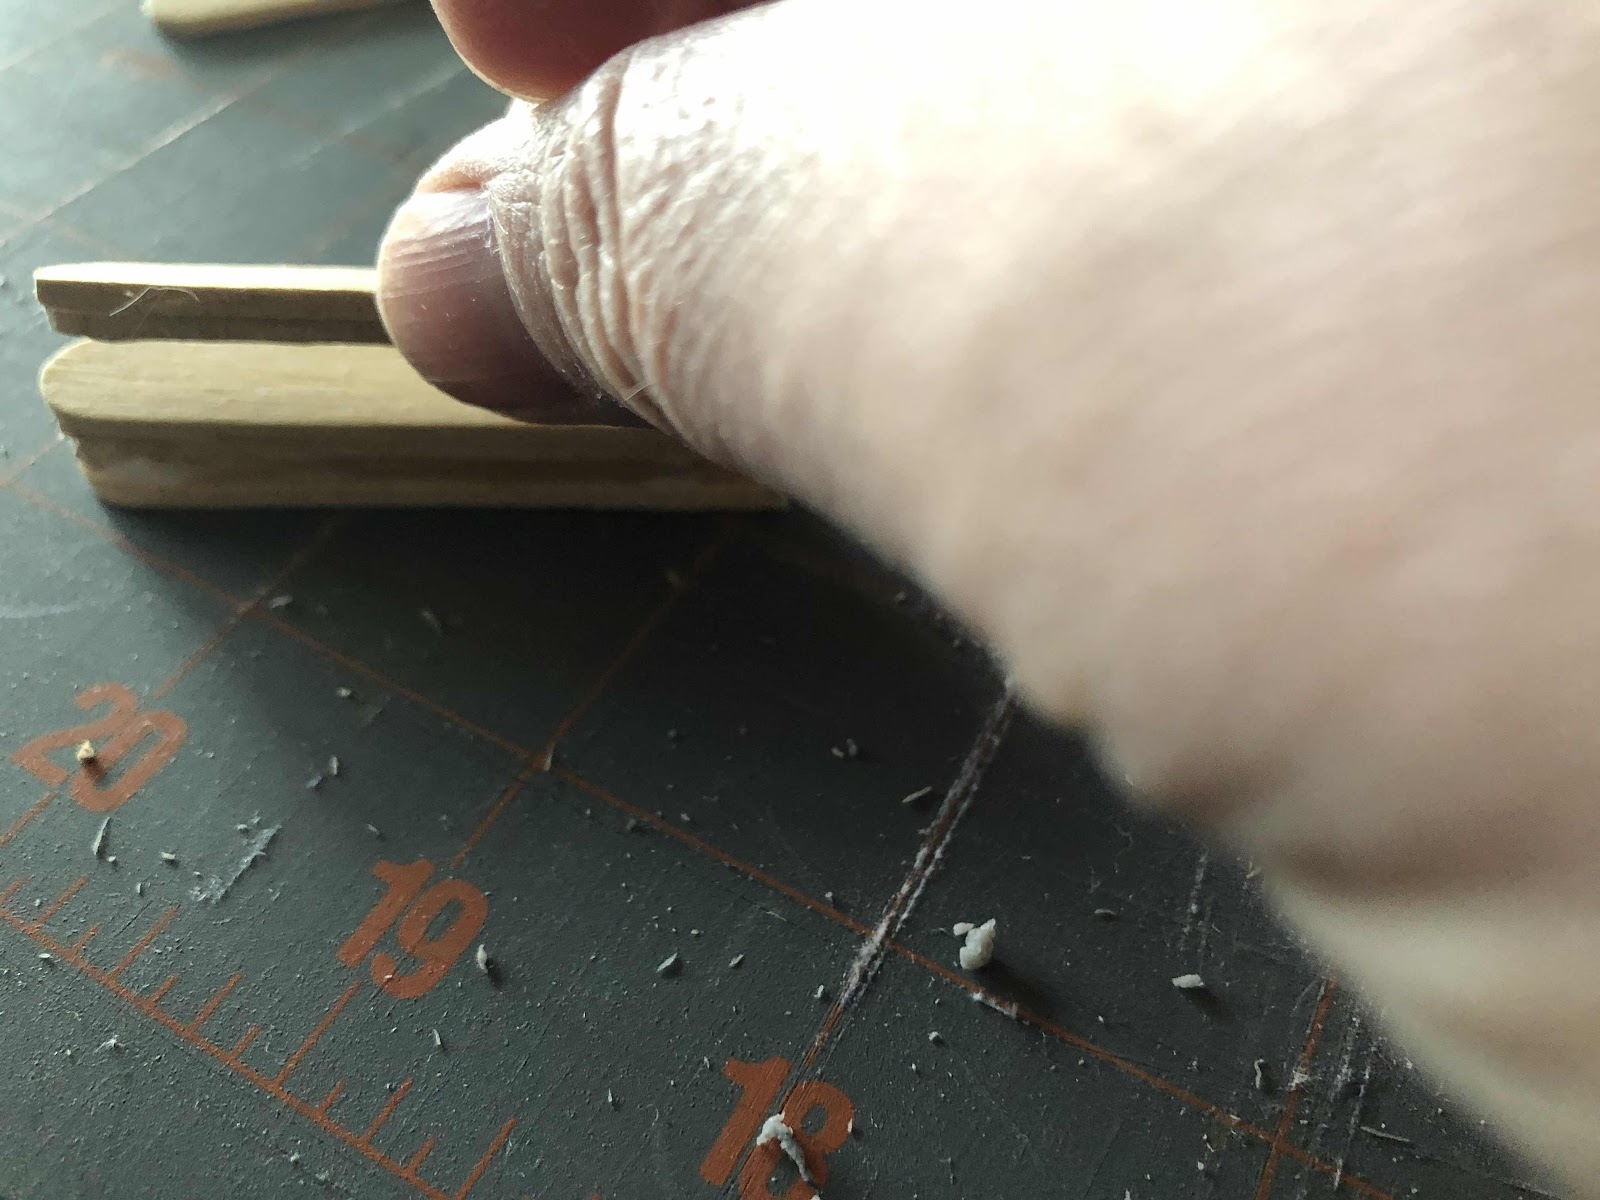
Repeat the process until you have a radiator the size that you want for your house, alternating wide with narrow pieces.  The very last piece you add will be a wide piece and you will use a wide piece that has legs.

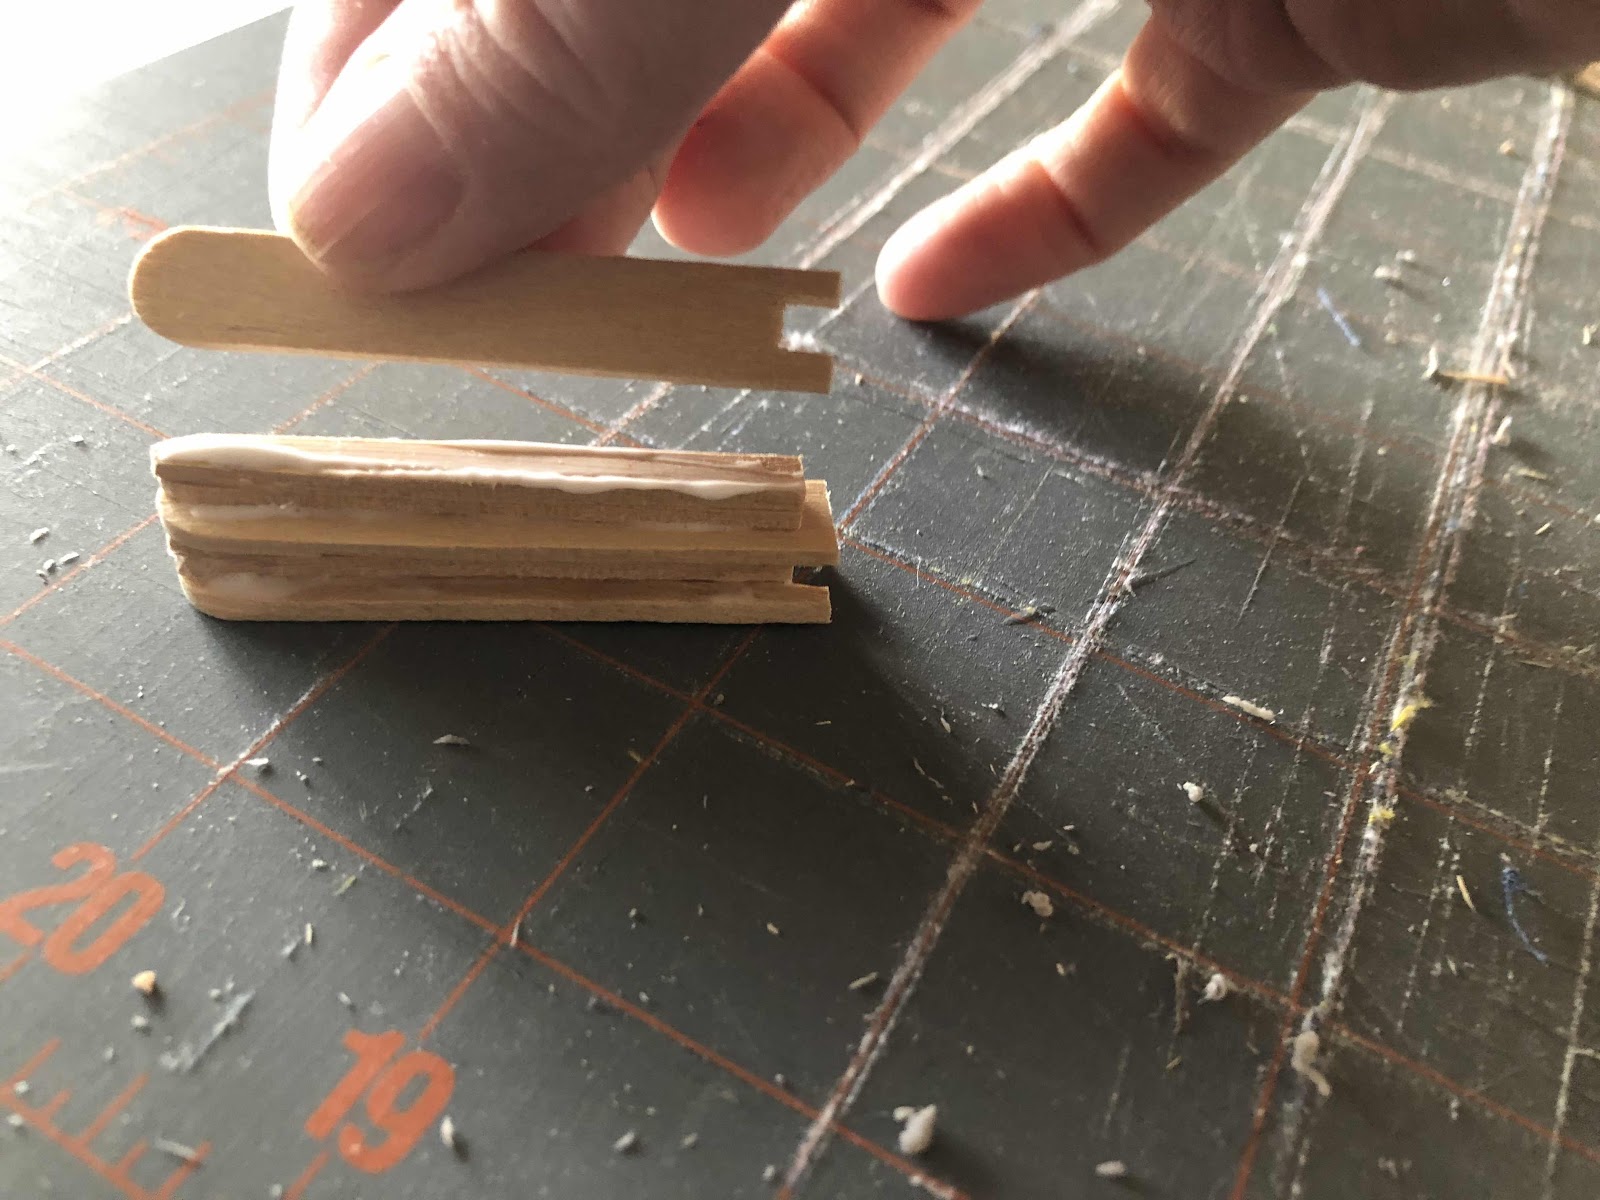
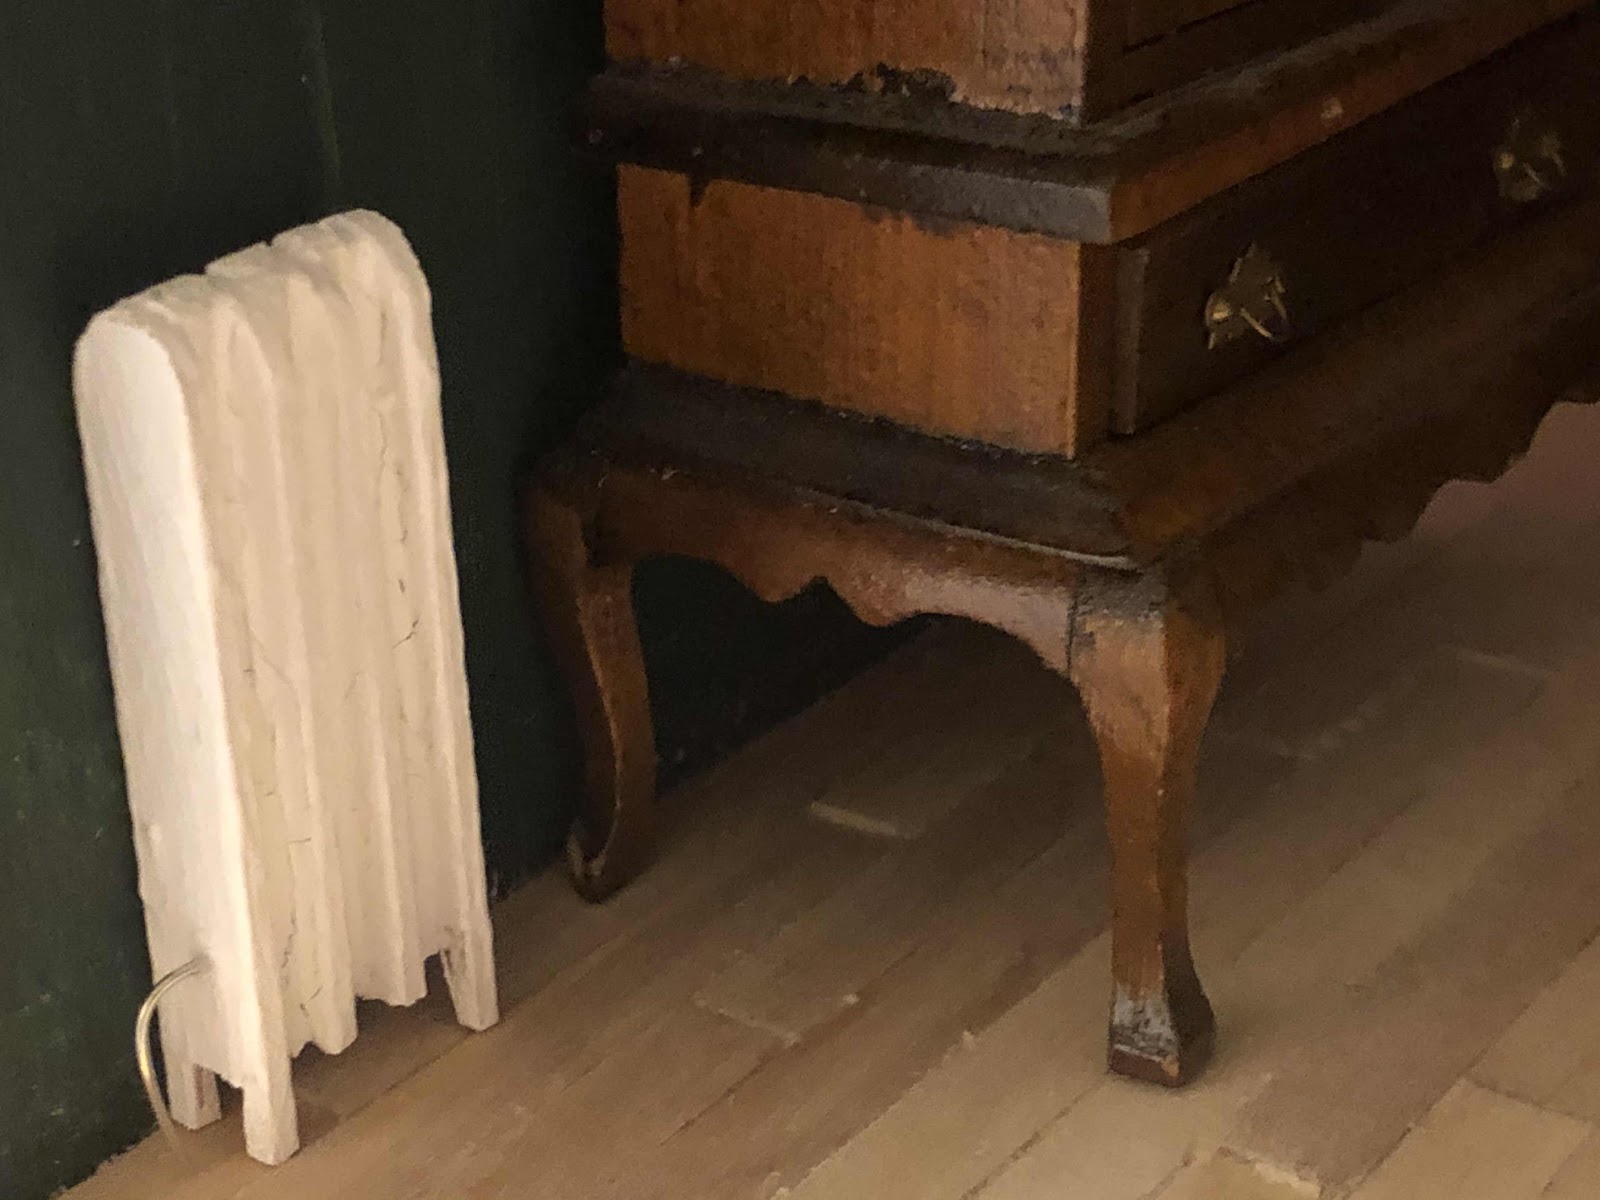
Now it’s time to step away and let everything dry!   Once dry you can paint them to your specifications and you are done...mostly!

I chose to add some water line pipes from the radiators to the floor for an extra touch of realism. I just grabbed some thin gauge wire (from the jewelry making department) and cut it to size...added a little bend and superglued it on!!!!


This was a super easy project to complete!  It was made using items that I had around the house.  It was a fun process!   I am loving the touch of realism it added to my Greenleaf McKinley house!!!


Monday, April 5, 2021

A house versus a home

I have been slowly working on some little things to turn my Greenleaf McKinley into a home.   I have the house.  I need to make it a home!   

I put a call out and got some suggestions and ideas and for that I am so thankful.  It kick started  my thought processes and I was able to get some projects started immediately!

First up, I made some rugs.  I made them in a ‘braided rug‘ style.  I had made some braided rugs for the Log Cabin  a few years ago and I was happy with how they turned out.  So I grabbed some supplies and got to work using the same techniques.  

I made a big rug for the nursery and two small rugs to go beside the bed in the master bathroom.  I also made a rug for the kitchen. 


I didn’t stop at rugs.  No way!  I printed up some book covers and made a few ‘Little Golden Book’ and some Beatrix Potter books for the nursery.  

Now to figure out a book shelf for the nursery.....hmmmmm.

I was sorting through my supplies and stash this past week and I stumbled upon a little round wooden table.  It was unfinished wood but I wasn’t worried about that!  I was more concerned with the size.  Would it fit in the kitchen bay window?  Would it be too big?  I had purchased a perfect table a year or so ago and it was too big for the space....I guess it wasn’t perfect afterall!  (But it did make me dream of another project that WILL be perfect for that table!).   Could the perfect sized table have been in my stash all  along???  I put it into place and it seemed to work.  Could a girl get so lucky?   I didn’t want a wood table though.  But that’s not a problem!  I pulled out my paint!

First up the whole paint got a few coats of white paint!

Next up was some red paint for trim!   I just love red!!!!

The table looks adorable in the kitchen!   But now I need items for on top of the table.  So one problem solved but a new problem created!    Does this ever end?   (I hope not, I’m having too much fun!)