Monday, March 29, 2021

Help Needed

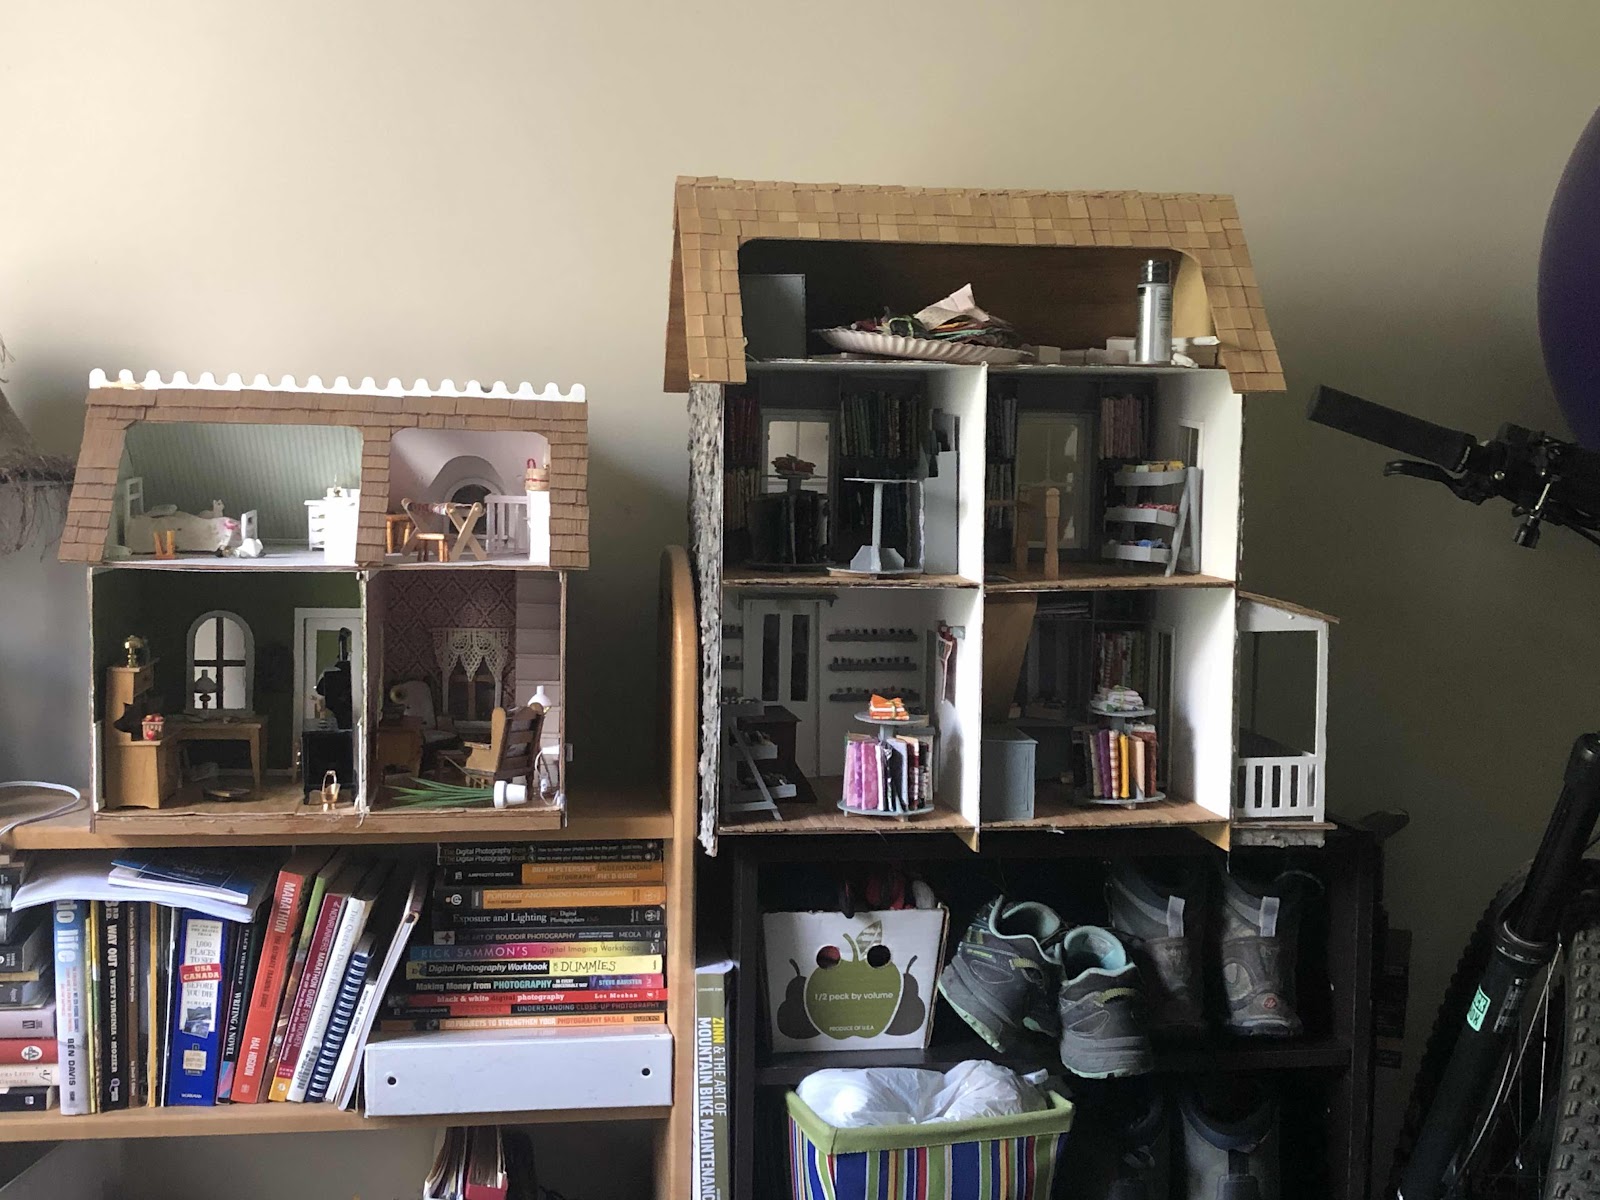
 A week or so ago I posted a wee short video showing my Greenleaf Mckinley  on my Youtube Channel.  The house is 'mostly' done.  It is fully furnished but while I am thrilled with it, I know that it is missing something!!!!!  I have learned something about myself.....somehow my eye for making the houses look lived in and 'real' has disappeared.   And I'm struggling with that!!!!  I asked for help on that youtube channel.....and I'm going to ask for help here too!!!  I am showing the rooms and adding in the ideas that I was given and that I already have or have come up with.....but HELP!!!!


So here goes......

The kitchen


The kitchen definitely needs something also!  It was suggested a tea towel, a rug and a table.  I had resisted the idea of a table simple because of space.  But I am planning on adding one (I have a wooden one I can paint).    Throw your ideas at me!!!!
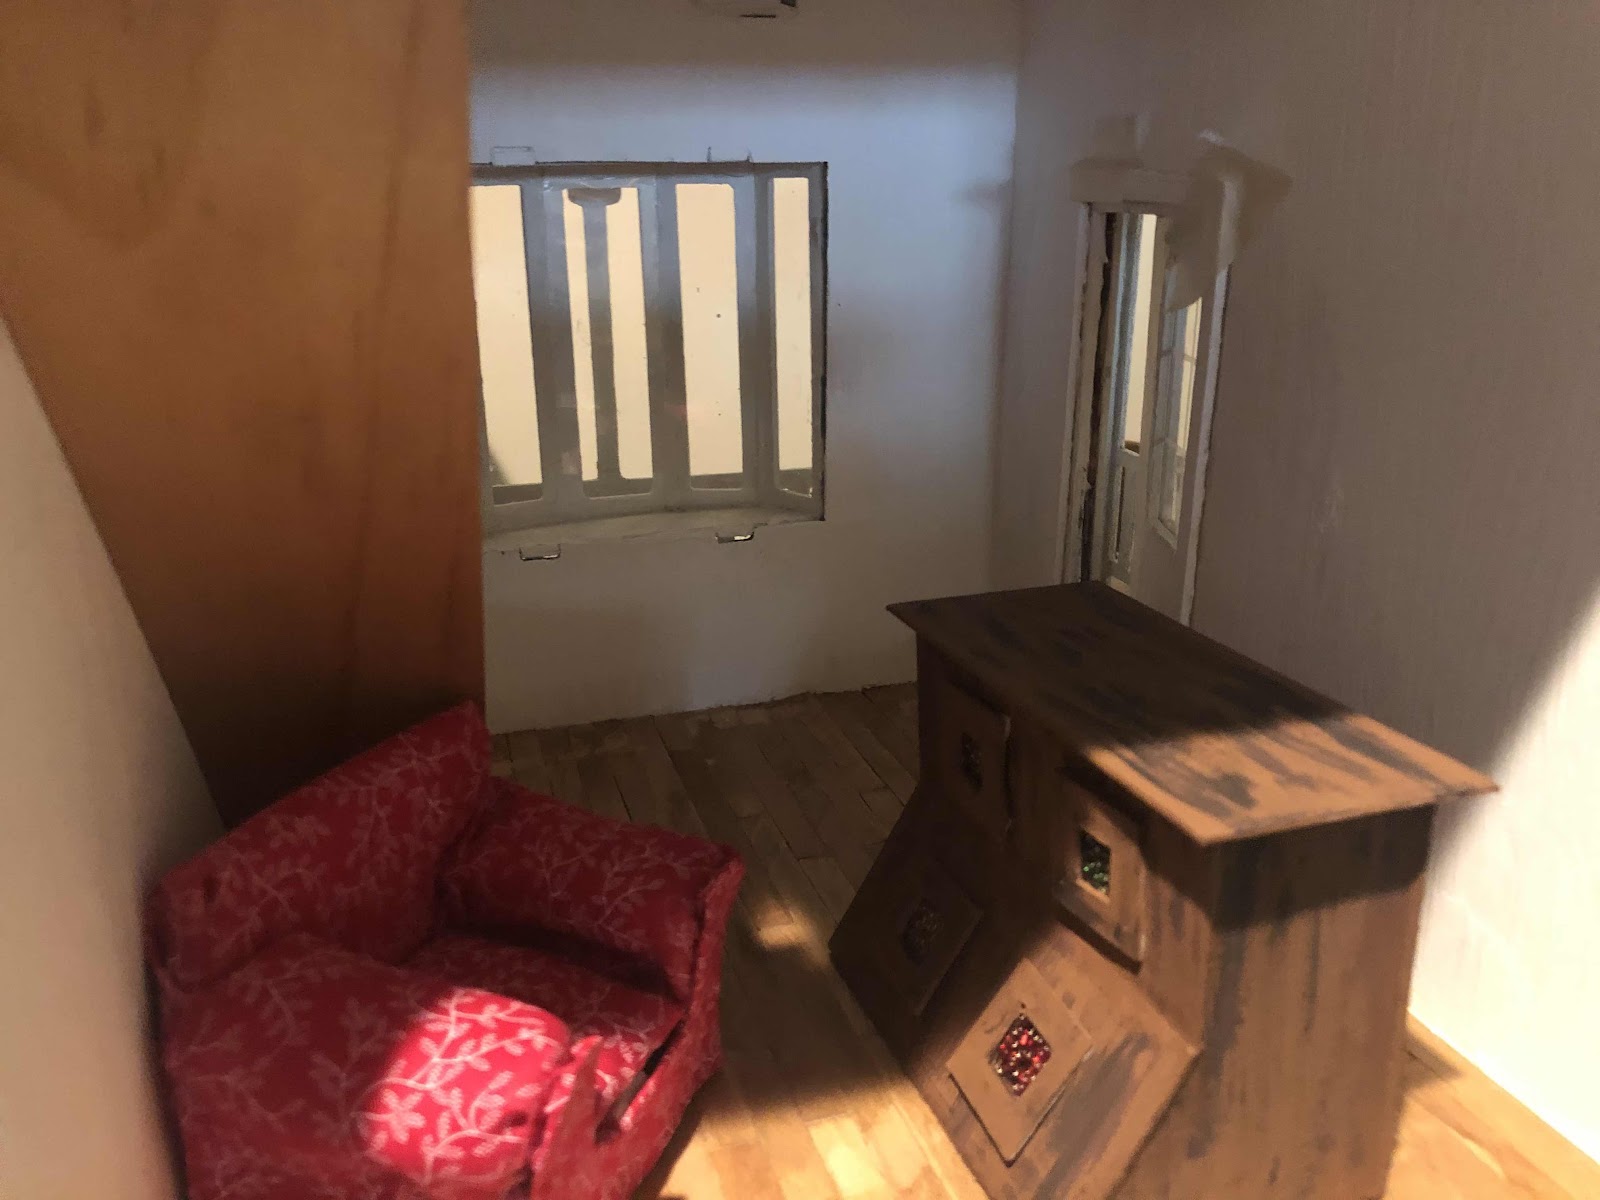
The Living Room 


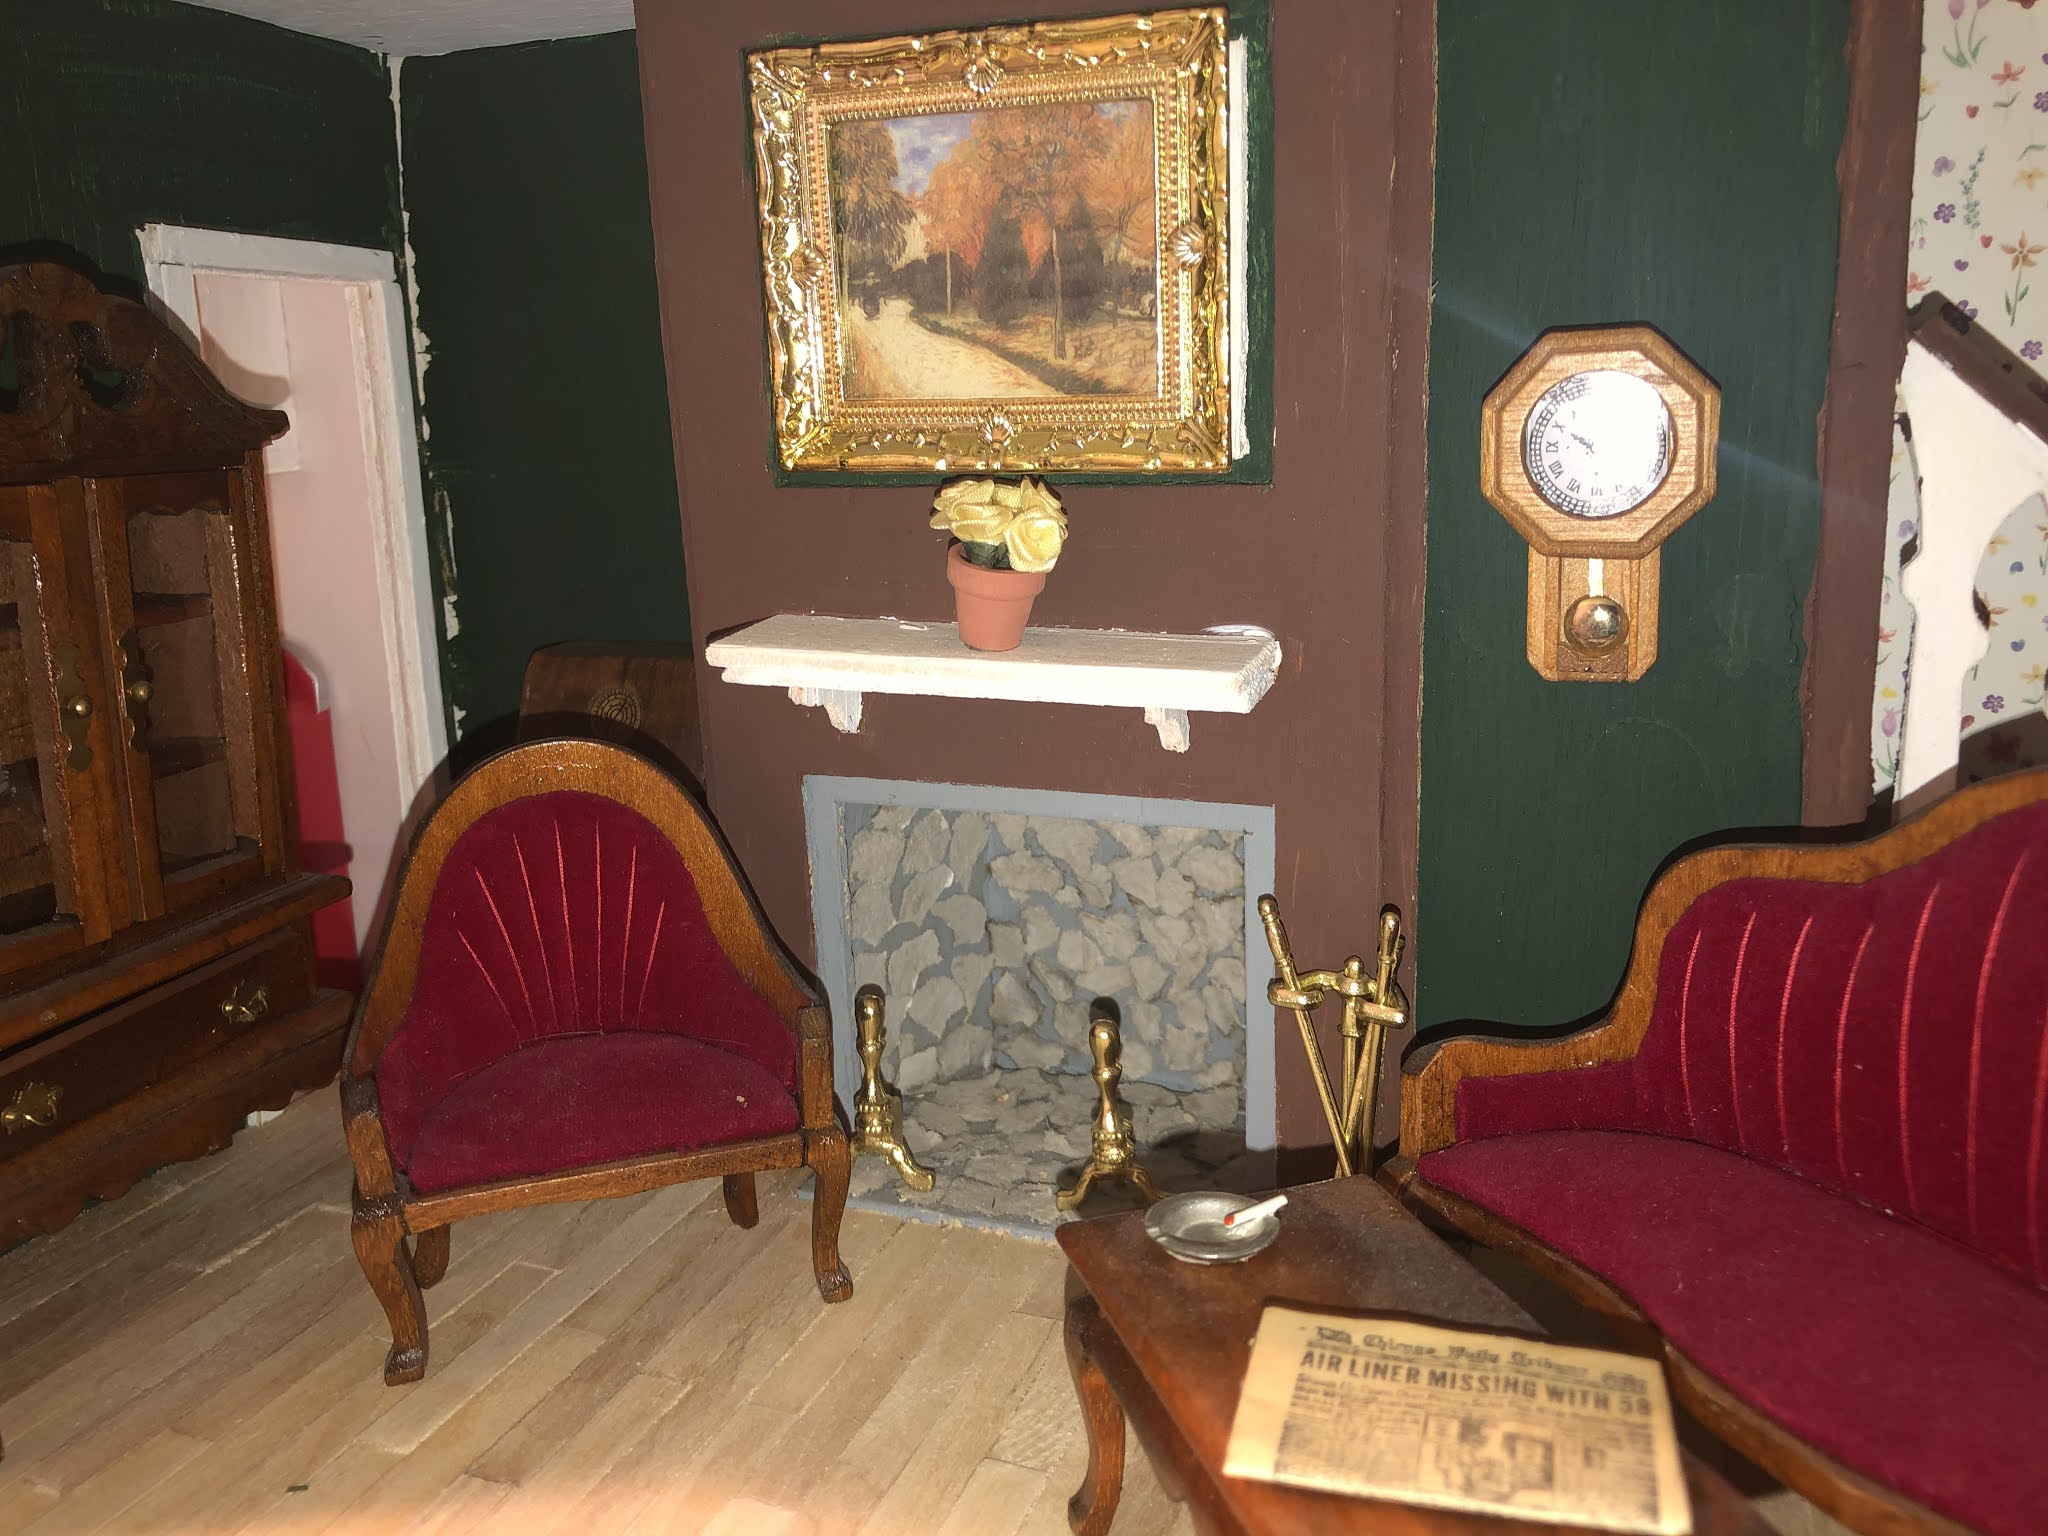
The suggestions:  A teacup, books or vases in the cabinet, logs in the fireplace, a rug.   I have added a pack of cigarettes beside the ashtray (hey, I don't smoke but it IS a 1950's era house!)  What else????

The Nursery


The nursery...probably my favorite room!  It was suggested mess it up with some toys on the floor, someone suggested a rocking horse.  (which I happened to have one).  I am in the process of adding books and a rug....the rocking horse and a rocking chair.   But I don't want a 'sterile' nursery....I want a lived in nursery....help!  
The Bathroom

I actually think that I have this room pretty well done.  I need something on the wall behind the toilet.  Someone suggested a fish or something...but I'm open to ideas!
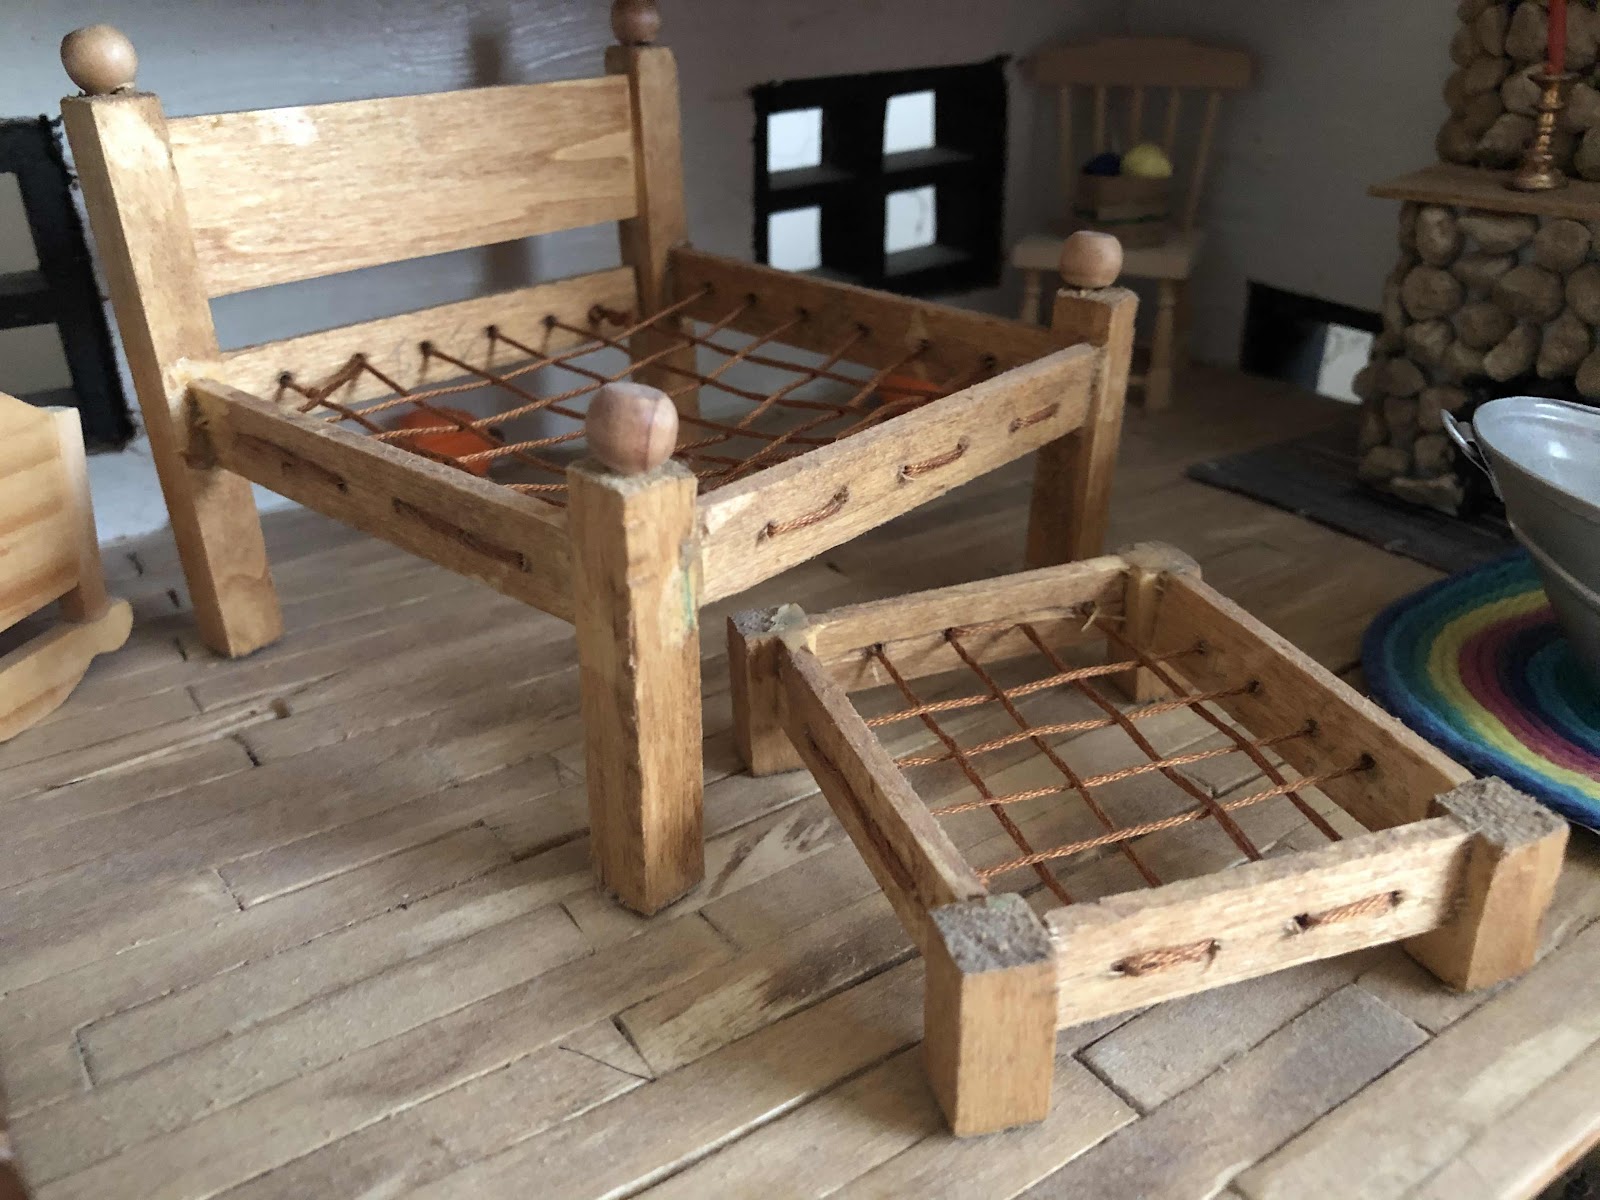
The Master bedroom

I have added some small rugs beside the bed.....and someone suggested a full length mirror (which will replace the rocking chair that I moved to the nursery) and a trunk at the end of the bed.   

So that seems to be my weakness......turning the dollhouse from a sterile neat home to a lived in house.  I am looking for inspiration to help get my creative juices flowing.

I know that once the ideas start flying at me that my brain will kick in with all sorts of things.  I have also come up with an umbrella /cane stand by the front door, radiators, pillows for the couch and window seats, light switches, and lights around the house.     SO if you have any other suggestions.....

If you want to see the short video......


Wednesday, March 24, 2021

I went and did it! Dollhouse number 5

I went and did it!     I saw a dollhouse on Facebook marketplace and I just had to buy it!  Honestly I didn’t really want another house.  I had other plans....but a new house I got!!

Finishing up other miniature projects

I have worked on the StoneHouse quilt shop in the past year and it is honestly starting to show signs of being close (closer) to being done!  I have also been working on some of those last items in the 1950’s house   That house really just needs all those little items that make it a home and not just a decorated house.   I have been slowly working on getting those items added to the house.  It’s been fun!

I was making my plans to finish up one of those projects and then I was going to dive into my next project.  I had my next project perfectly planned in my head. I was going to create a 1950’s diner!   I was so excited!

Change in plans for my miniature dollhouses 

I was honestly not looking for a new building!  I had decided to build my own room box for my diner.  But, things don’t always go as planned!   I was scrolling through Facebook and noticed a post by someone talking about a house on Facebook marketplace.  They even mentioned that it was in Frederick, MD....my town!   Uhhhhh. I had to go look at the post!   I don’t know what overcame me...next thing I knew I was contacting the seller!  She originally turned down my low ball offer...but eventually made a counter offer that I accepted.  I was excited but had no plans to work on this dollhouse anytime soon.  I had my diner to build!!!  This new dollhouse was going to go into our storage closet...I figured it was about the same size as my other houses and I could spare that room in the storage closet!

We went to pick up the dollhouse. Uhhhhh. It was huge!   My heart sank even as excitement poured through me!   I was excited to get such a neat project to remodel!   I'm thinking 1920's time frame!!! But seriously...this thing was huge!  There was no way it was going to fit in our already overcrowded storage closet! 

A solution to the miniature madness

We carried in the dollhouse and put it on the dining room table. With the drop leaves down and no extra leaves in the table, this dollhouse hangs over the edge! It dwarfs the other houses! 


  I knew that I had to get to work right away on the new house!  I had to at the bare minimum shore up the outside and bring it to life. This dollhouse needed some love and I just couldn’t wait!

The dollhouse needed some work on the shingles and the porch was a hot mess.   I also decided that gray was not my thing.  I wanted an old fashioned looking farmhouse...so white with green trim was the way I decided to go!!  I luckily had some shingles that matched and I was more than happy to fix the shingles and the railing around the porch.

The biggest work that needed to be done though was finding homes for all of my dollhouses.  We live in a small apartment and 5 dollhouses are a serious threat to taking over!  

The easiest solution was to hang the McKinley dollhouse.  The Greenleaf Mckinley is actually created to hang on the wall and thus save space.  I have NOT hung it in the 4.5 years since I have owned it.  It was time!   That cleared up so much space!   The next thing was the little blue house...as I affectionately call it, the Mini Mansion.  I went out and bought a shelf and hung that one also!  Two dollhouses out of the way!   I have some plans to hang the Stonehouse Quilt shop also.  But that will come eventually!   
In the meantime, I have created enough room to be able to not be quite so overwhelmed with dollhouses!

Let the work commence!!!!!


Wednesday, June 10, 2020

StoneHouse Quilts: Problem Solved

Where do I put the quilt shop?  The dining room has looked like a cyclone struck for quite some time as I have had projects on the table, the actual quilt shop on the table,  the McKinley on a bench against the wall.  Luckily I live with and love a very patient and understanding man who hasn’t seemed bothered about my hobby and the accompanying messes! But honestly, I have despaired about what in the world to do with another dollhouse.  Where was I going to ‘permanently’ display this house.   Where indeed!   Was I going to be forced to sell/give it away as soon as it reaches completion?

But luckily for me, I was sitting working at my desk  (I am currently working from home) and  I looked over and saw my Mini Mansion project sitting on a shelf across the room.    A partially empty shelf sat next to it (ok, it was it wasn’t really empty, but it didn’t have a lot on it) and I decided that the quilt shop had found its new home!

It’s not pretty at the moment because I have both houses turned with the fronts of the houses facing the wall...but you get the idea!

So what have I been doing?   Well, after the mini crazy quilt   I almost completely halted work on the dollhouse while I pieces a human sized crazy quilt.  I did one that had a bit of a modern twist.  It still needs quilted. But that’s on the back burner until I can hit a store and can find backing material.  With things finally starting to slowly reopen, that may happen sometime soon!

I didn’t let that stop me though.  I have done a few things in the world of dollhouses and particularly in the StoneHouse Quilt Shop

In the downstairs, not much has happened.  I still need to make a few small things like scissors, more things for the shelves , items for the check out counter and I need to hang the quilts!  (And apparently take down the tape on the over the door shelf now that the glue is dry!)


The upstairs is where I have done a fair amount of work.  I built more display shelves and made a ton of bolts of fabric...and a ton of ‘fat quarters’ for the display!  I think that I am done with furniture.  I don’t think I will know for sure until the quilts go up on the walls.  I think that the quilts will add a lot of depth and ‘coziness’ to these rooms. So that just leaves me with the little fun things to add...which I have to make of course (since this project is all about buying nothing and making it all!).


The second picture.  I am so debating.  I have another circular display...does that room need the second one?  Or does it just overcrowd the room?

Ahh decisions decisions decisions!  

The attic poses another question mark for me.   Quilting room?  Storage?  Office?  More displays?  Right now it is my storage area for everything.  But I’m getting to the point that I will soon have to focus on that space.

It is a slow process.  But I am thoroughly enjoying creating the StoneHouse quilt shop!  My mind is spinning with ideas for this project AND the next project!  Soo much to do...so little time!!!

Thursday, May 28, 2020

A Miniature Crazy Quilt

I am well into the thick of things in regards to the creation of my StoneHouse Quilt Fabric Shop.  I have a lot of furniture built and in place.  I have been working on some of the smaller items needed to bring this miniature to life.  It was time to make a few quilts for display in the shop.

I have always absolutely loved quilts and it has always been on my bucket list to create a human sized crazy quilt.  When we went away a few months ago I took a picture of one in a museum that we visited.
So it should come as no surprise that one of my mini quilts for display would be a crazy quilt.  I really had no clue what I was doing!  NONE!  But I forged ahead with what seemed like a logical plan.

I started with a rectangle foundation of a thin white fabric and a table of small scraps of fabric.  I organized the fabric a bit so that I could quickly grab pieces that were different.

I know it doesn't look organized, but it was...at least for me!   I didn't throw anything away.  the pieces of fabric were tiny scraps that would normally have been thrown away!

I started with one small piece of scrap fabric up to the edge of the foundation fabric and held it in place with my fingers.  I then proceeded to do a small whip stitch on the outer edge of the scrap fabric. 

When that was securely attached to the foundation, I picked another piece of fabric and held it against the first piece of fabric.  I then did a light little whip stitch to attach the second piece of fabric to the first piece.  And then yes, you guessed it, I did the same thing with the third piece...and fourth piece.  I would whip stitch anything that was overlapping a previously attached piece of fabric.  

It was tedious, but it really did go fast!!!  I was done within a few days!  


When I was done, I just grabbed a neutral piece of fabric for backing and rolled the edge over to make a small sashing/binding around the edge.  And Voila!  Done!

I can't wait to see this in place, hanging in the quilt shop!  Soon.....

In the meantime, I am riding high on the success of my quilt  I have resisted putting any quilt on the rope bed in the Log Cabin,  

Why?  Because I love my bed so much!  However, I have already decided that I will be making another crazy quilt for that bed!  FINALLY, more than 5 years later, the rope bed will have a quilt!   I am also planning and thinking about other ideas for the quilt displays int he quilt shop!   I am only limited by my imagination!

Sunday, May 24, 2020

StoneHouse Quilt Shop: Built on Display Shelves

I had a back corner in a room of the Stonehouse Quilts Fabric store.  It was empty and sparse and I decided that I wanted to build a shelving system to the right of the bay window.
I originally just wanted something to the right of the window, but then realized that I was aiming too small!  Wouldn't it look better if I put in a whole wall display case?  It would look more cohesive, but it would also cover the tabs under the bay window.  A Win WIn situation.

I went to work cutting.  I measured a line and then ran to my paper and drew it out.  And slowly I came up with a plan.  I started to cut.  There was no pattern.  I made it to fit my specific needs and house.
I started to cut.  I used mat board, so I knew that I wouldn't be out much money if my plans didn't work.  I would just be out my time....but I would have learned valuable lessons so that would be nice regardless.   I cut each piece and worked it out in my head as I went.
I labelled each piece carefully, 

When it was time for me to decide on where to put the actualy shelves within my system, I pulled out a few bolts of fabric and designed my shelves to be custom.  I wanted them to fit my bolts of fabric perfectly.

And then it was the moment of truth.  It was time to glue it all together.  I was nervous but forged ahead.   And admittedly, when I went to check the fit, I did have to do a wee bit of trimming. 
Once it fit exactly, it was time to paint!!!!   I went with a nice neutral gray paint that will highlight the bold colors of fabric that will be displayed.

It turned out better than I expected!   I still have lots more to put onto the shelves.  But I can honestly say that I love it!!!!


Saturday, May 16, 2020

Checkout counter general store counter

I decided that for my check out counter for the Quilt Shop that I wanted an "antique".  In particular, I knew that I wanted an old fashioned general store display counter.  I searched a bit online and found this picture which I used as my model.
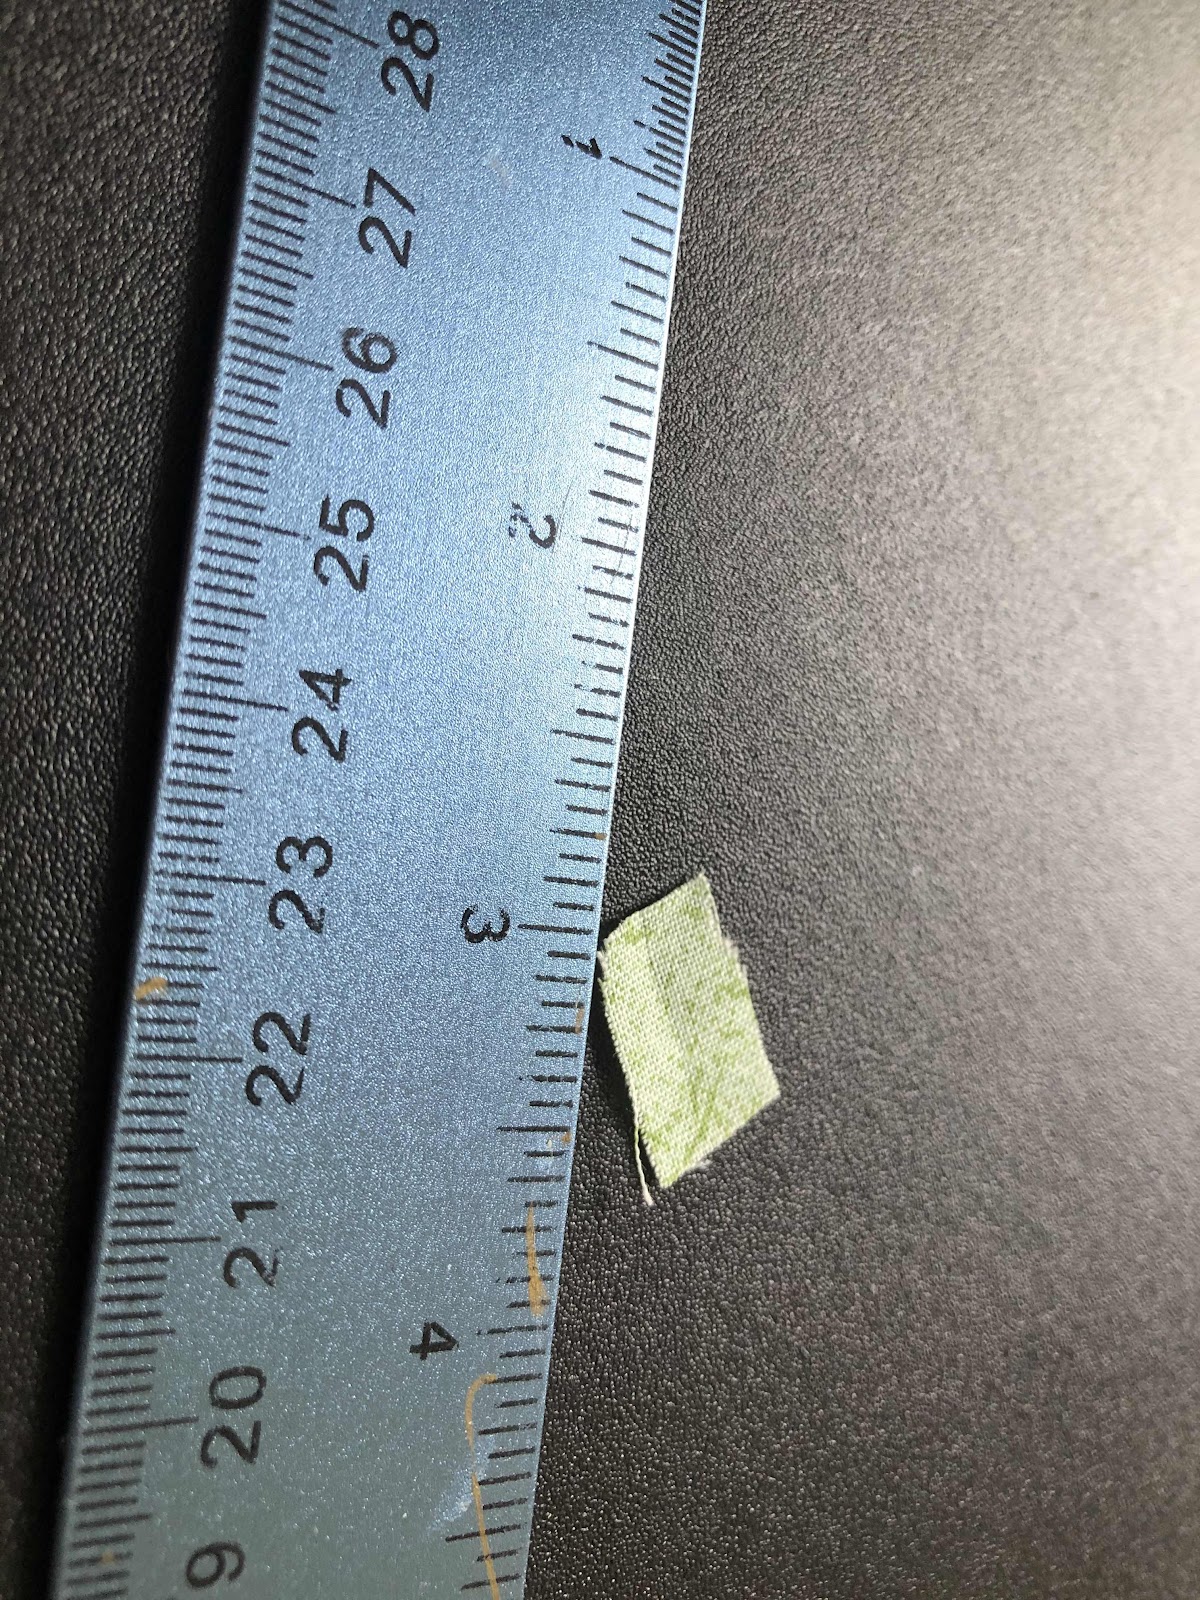
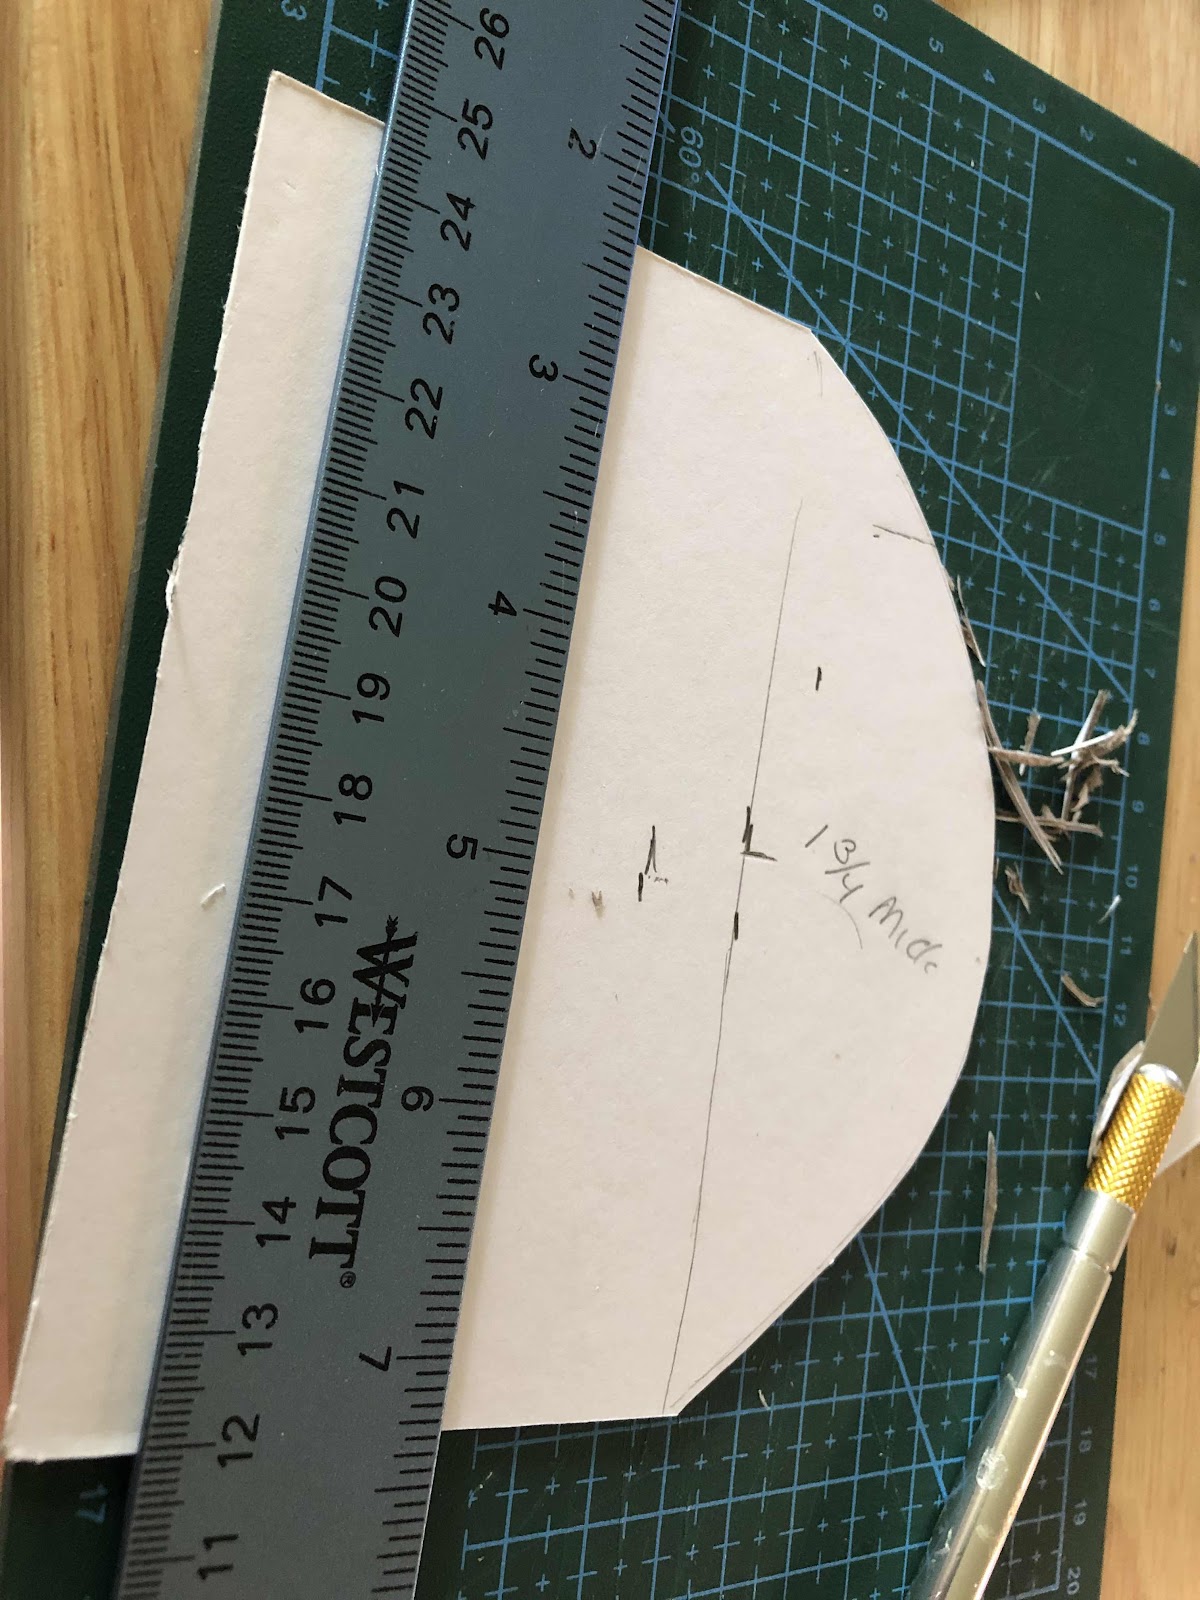
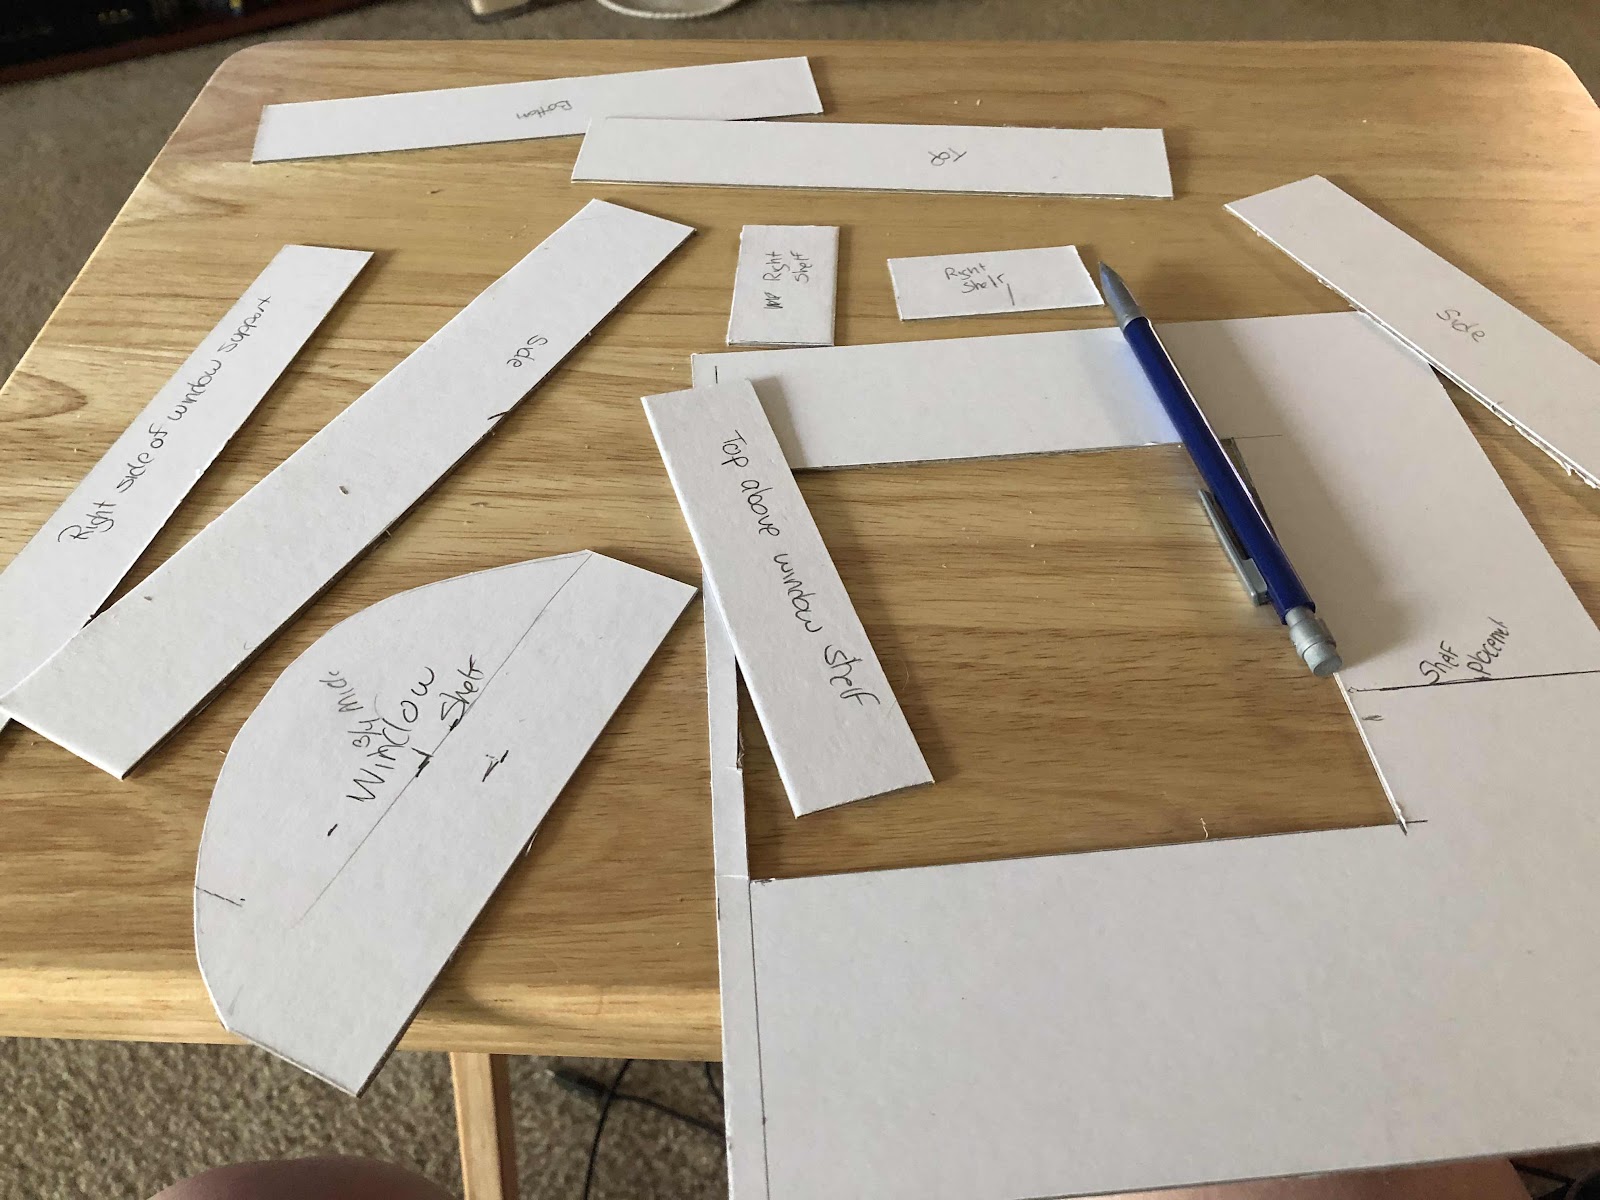
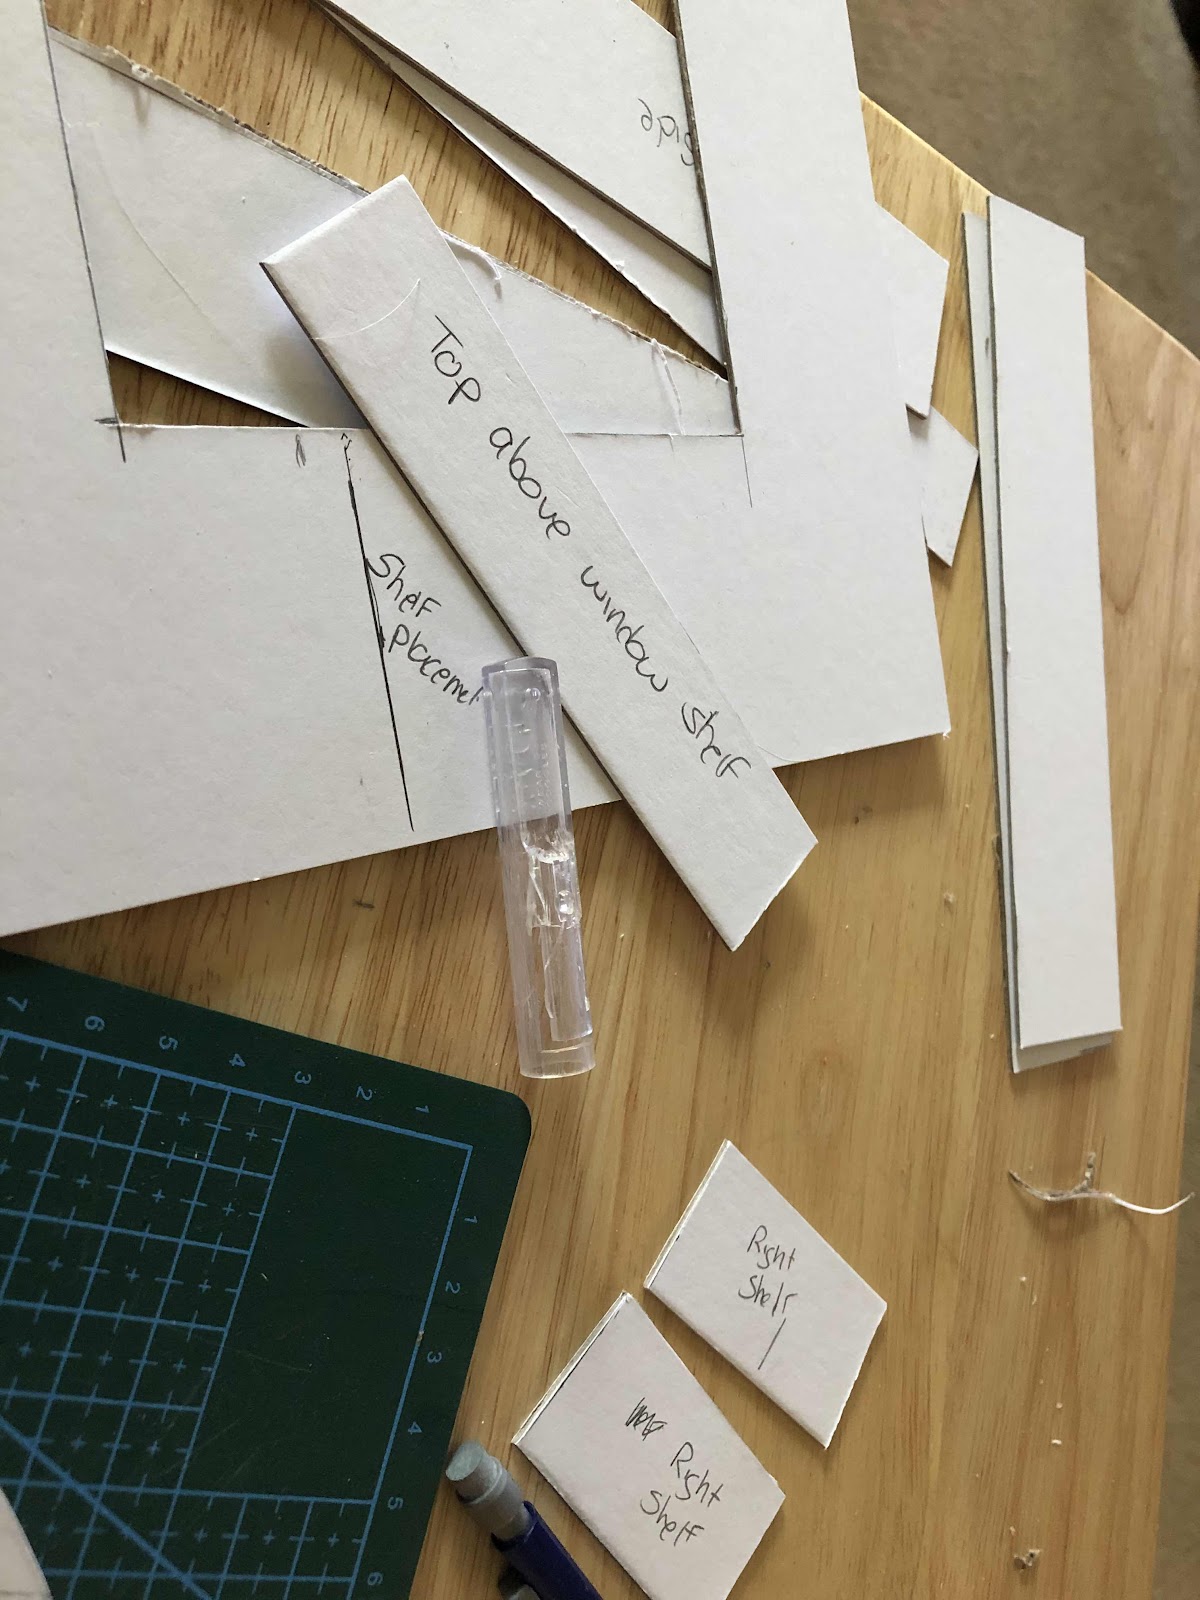
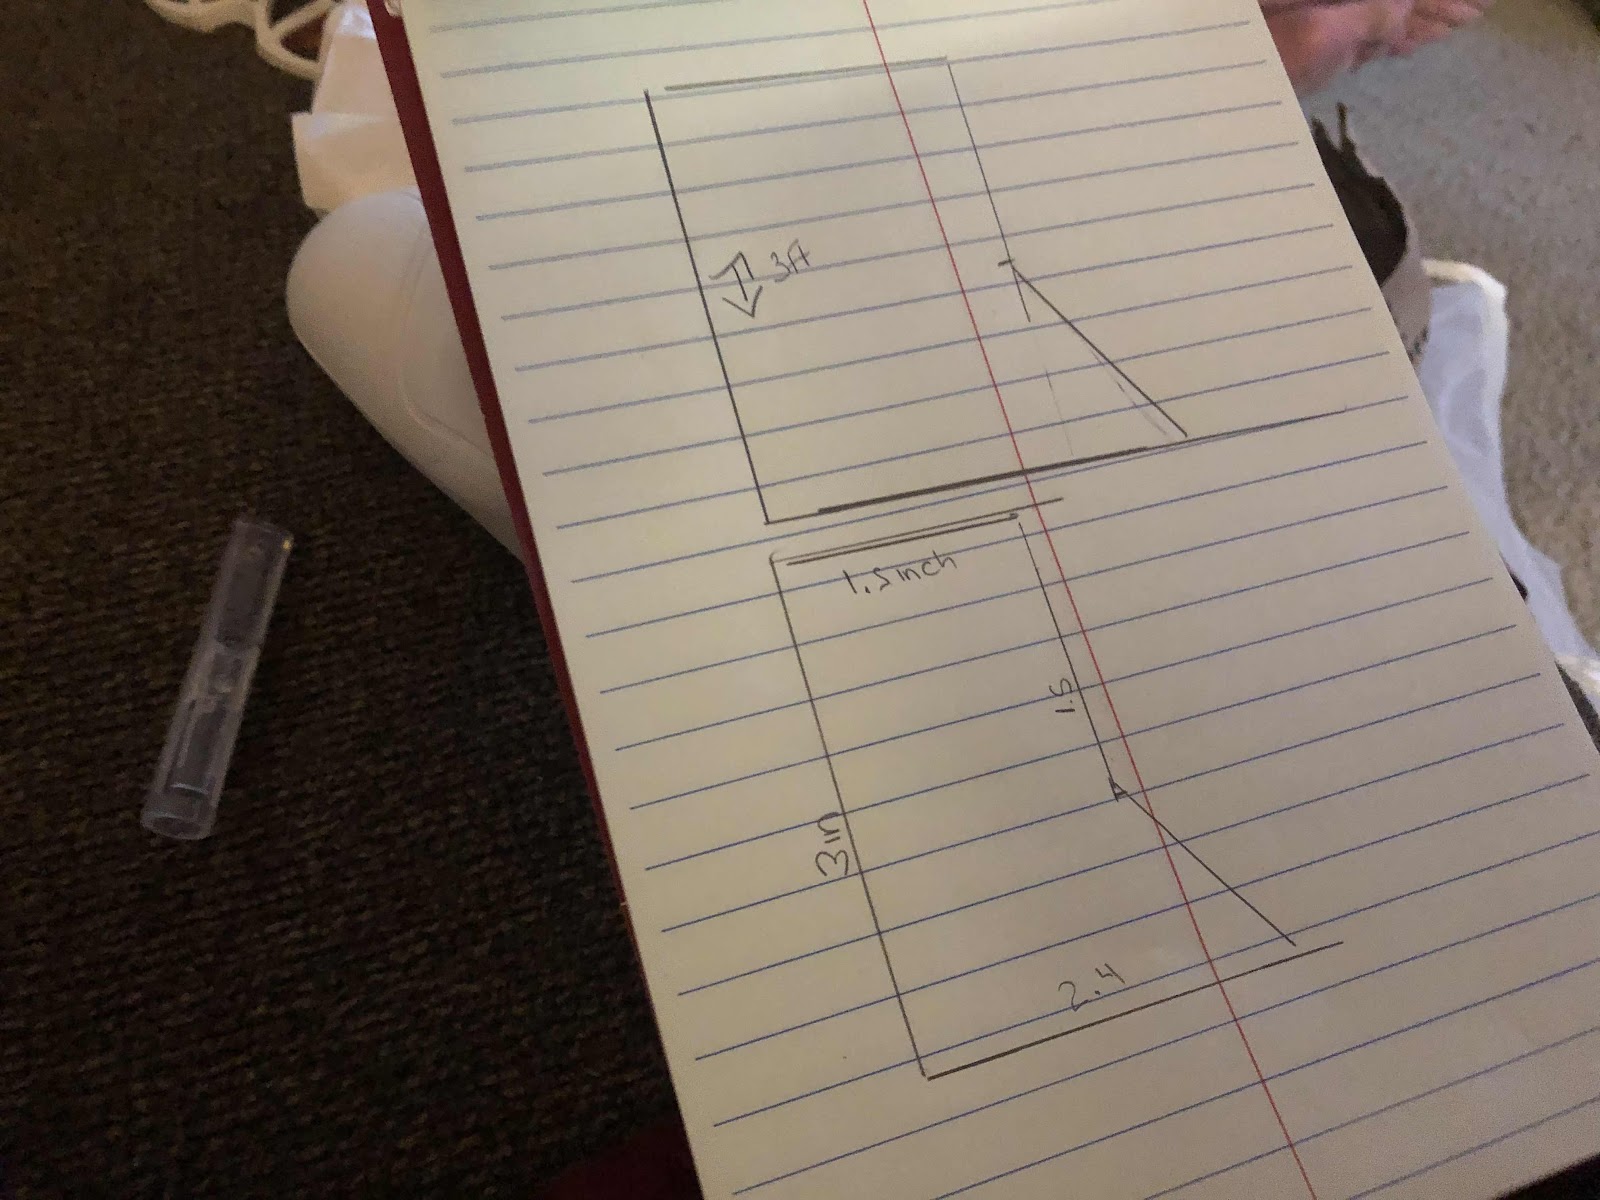
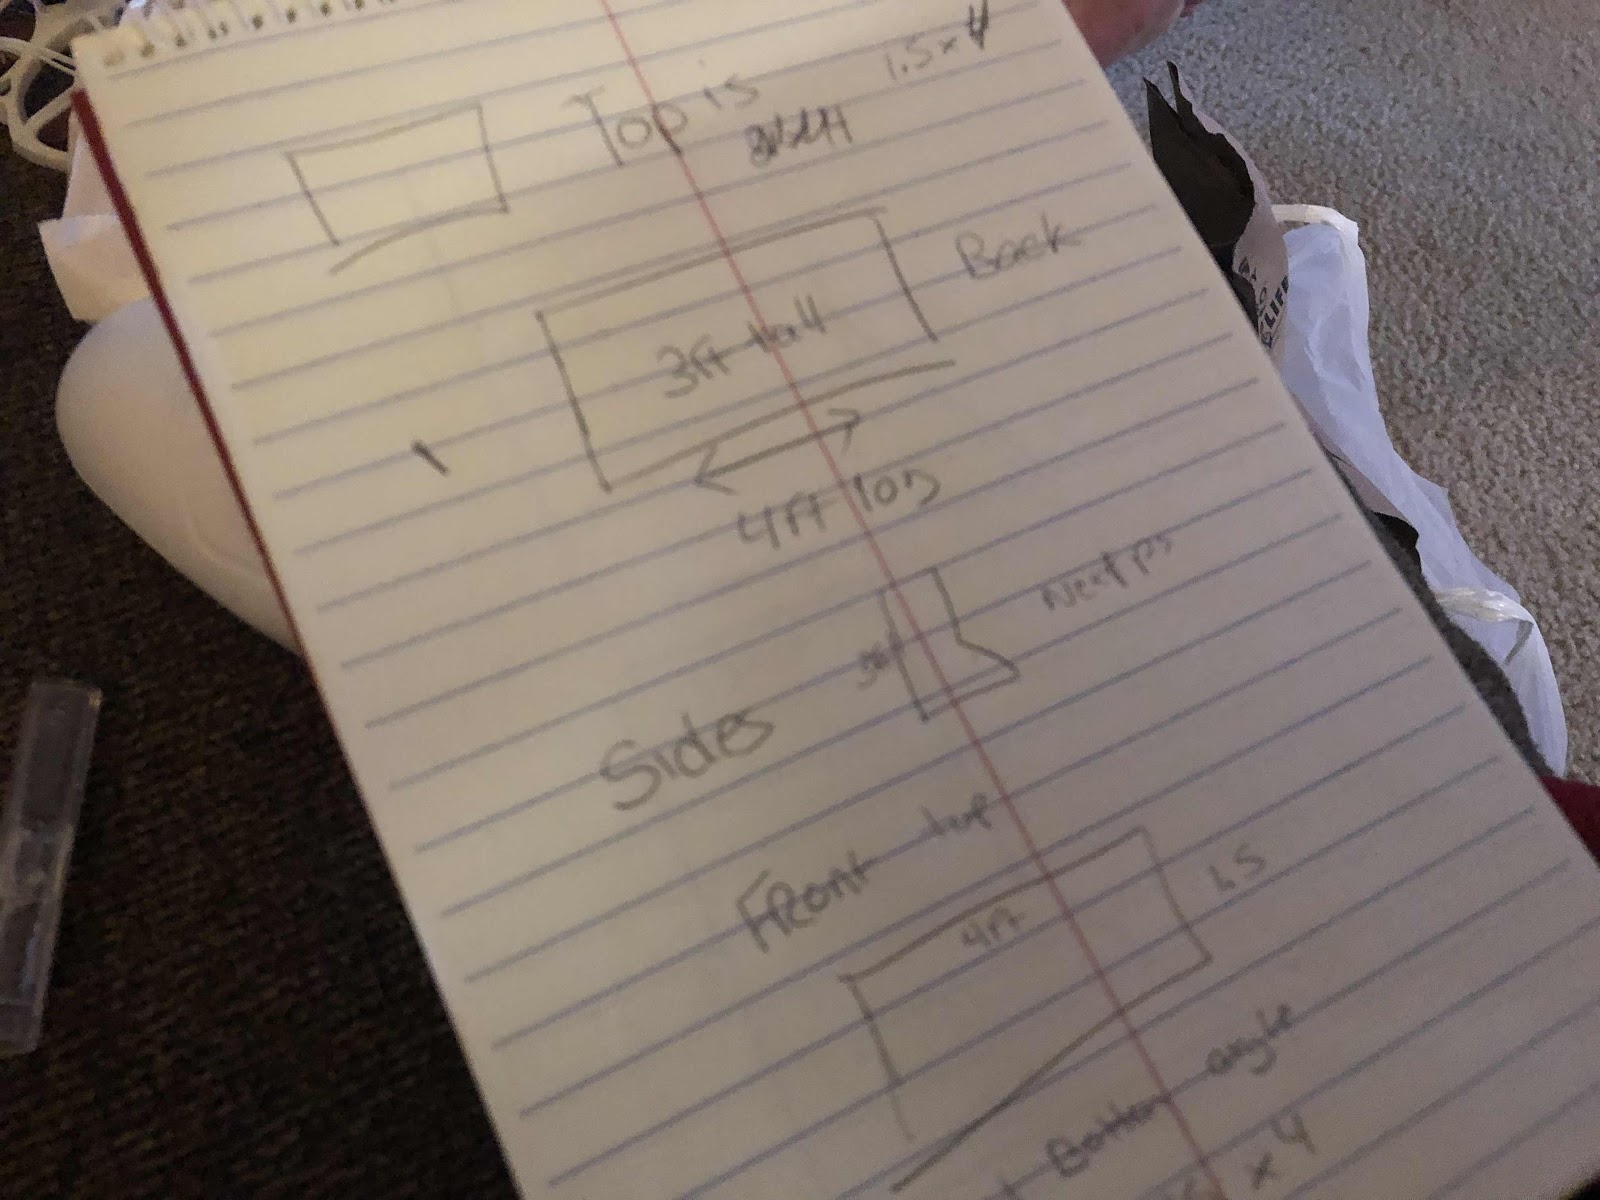
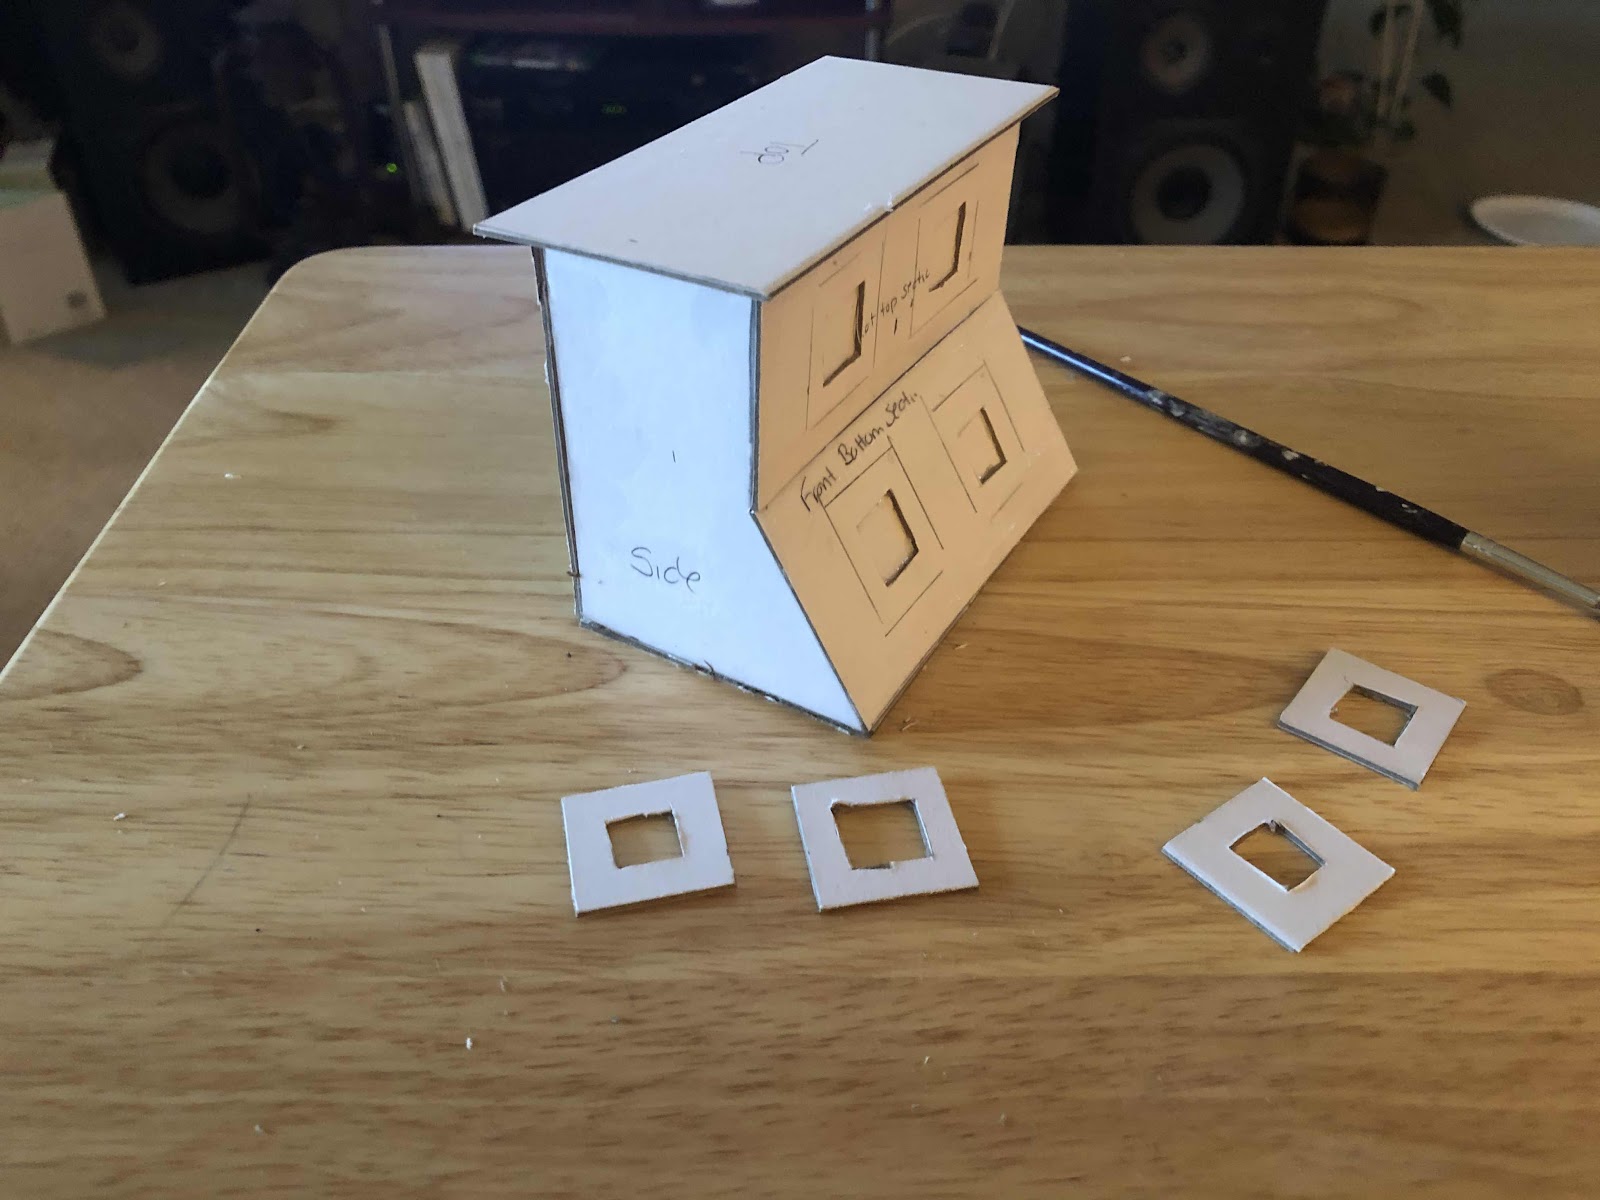
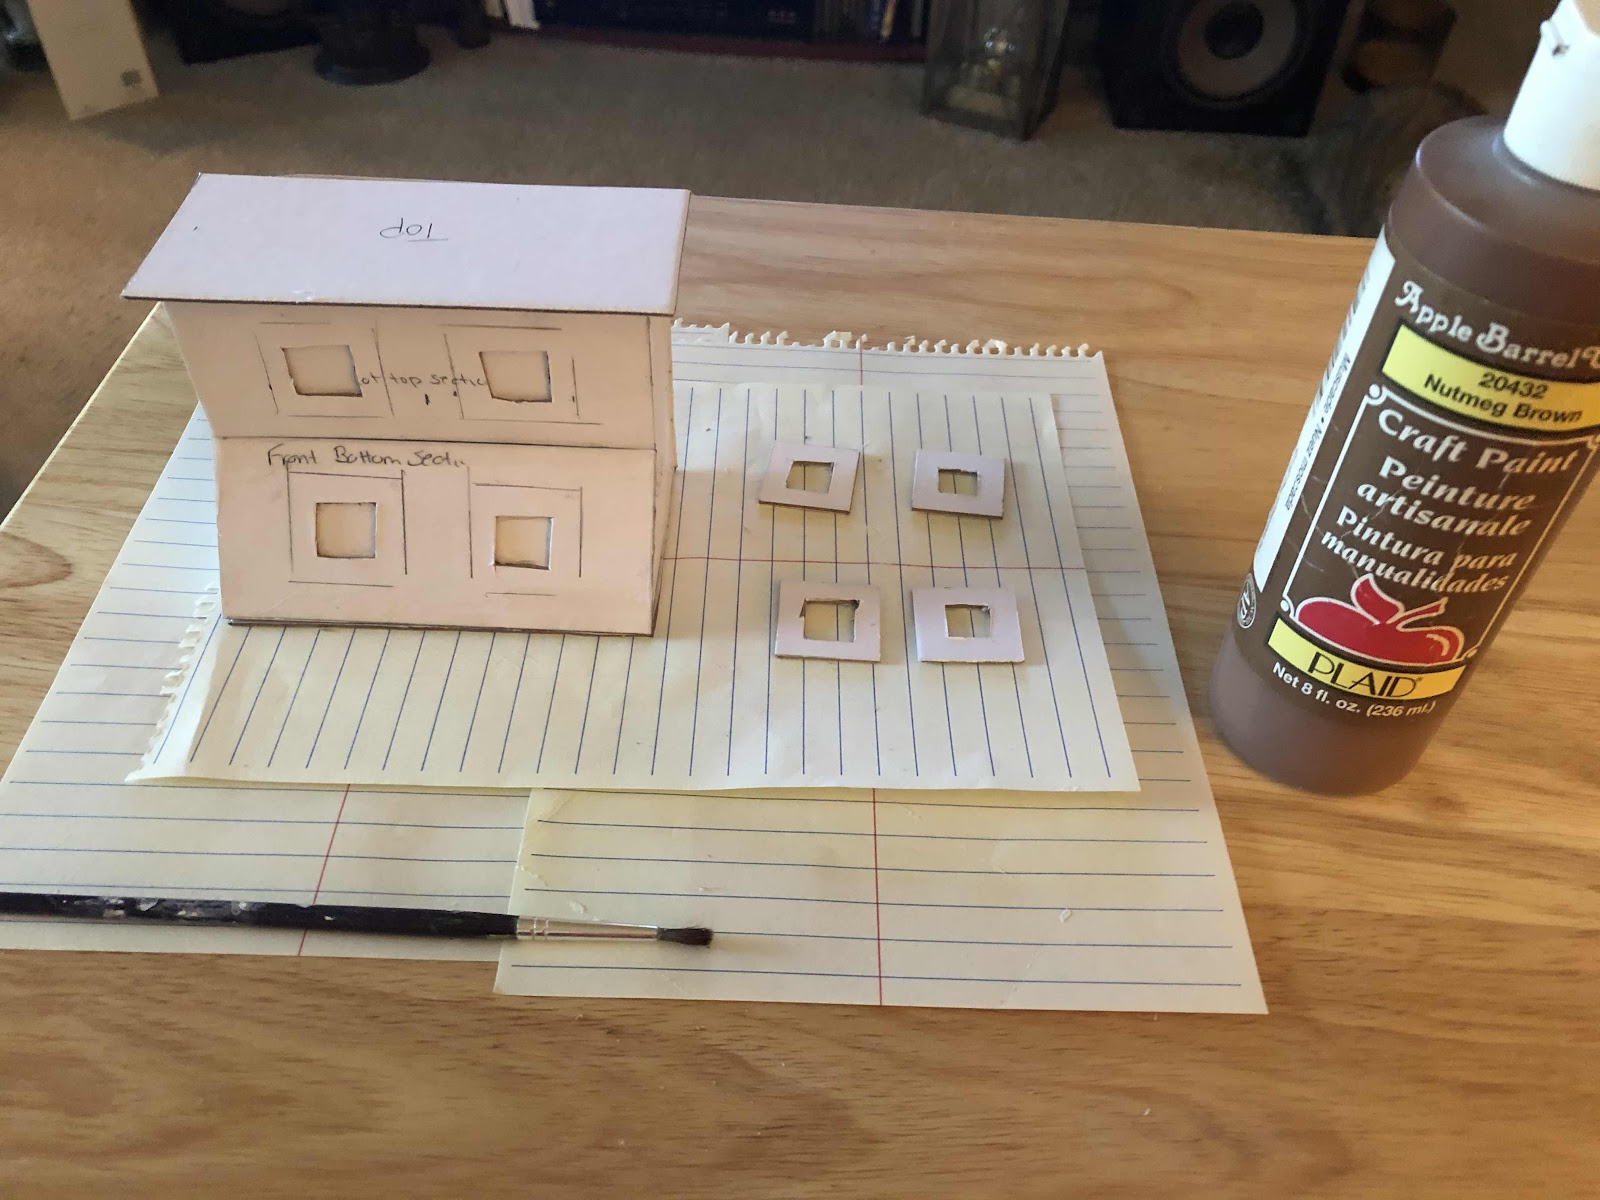
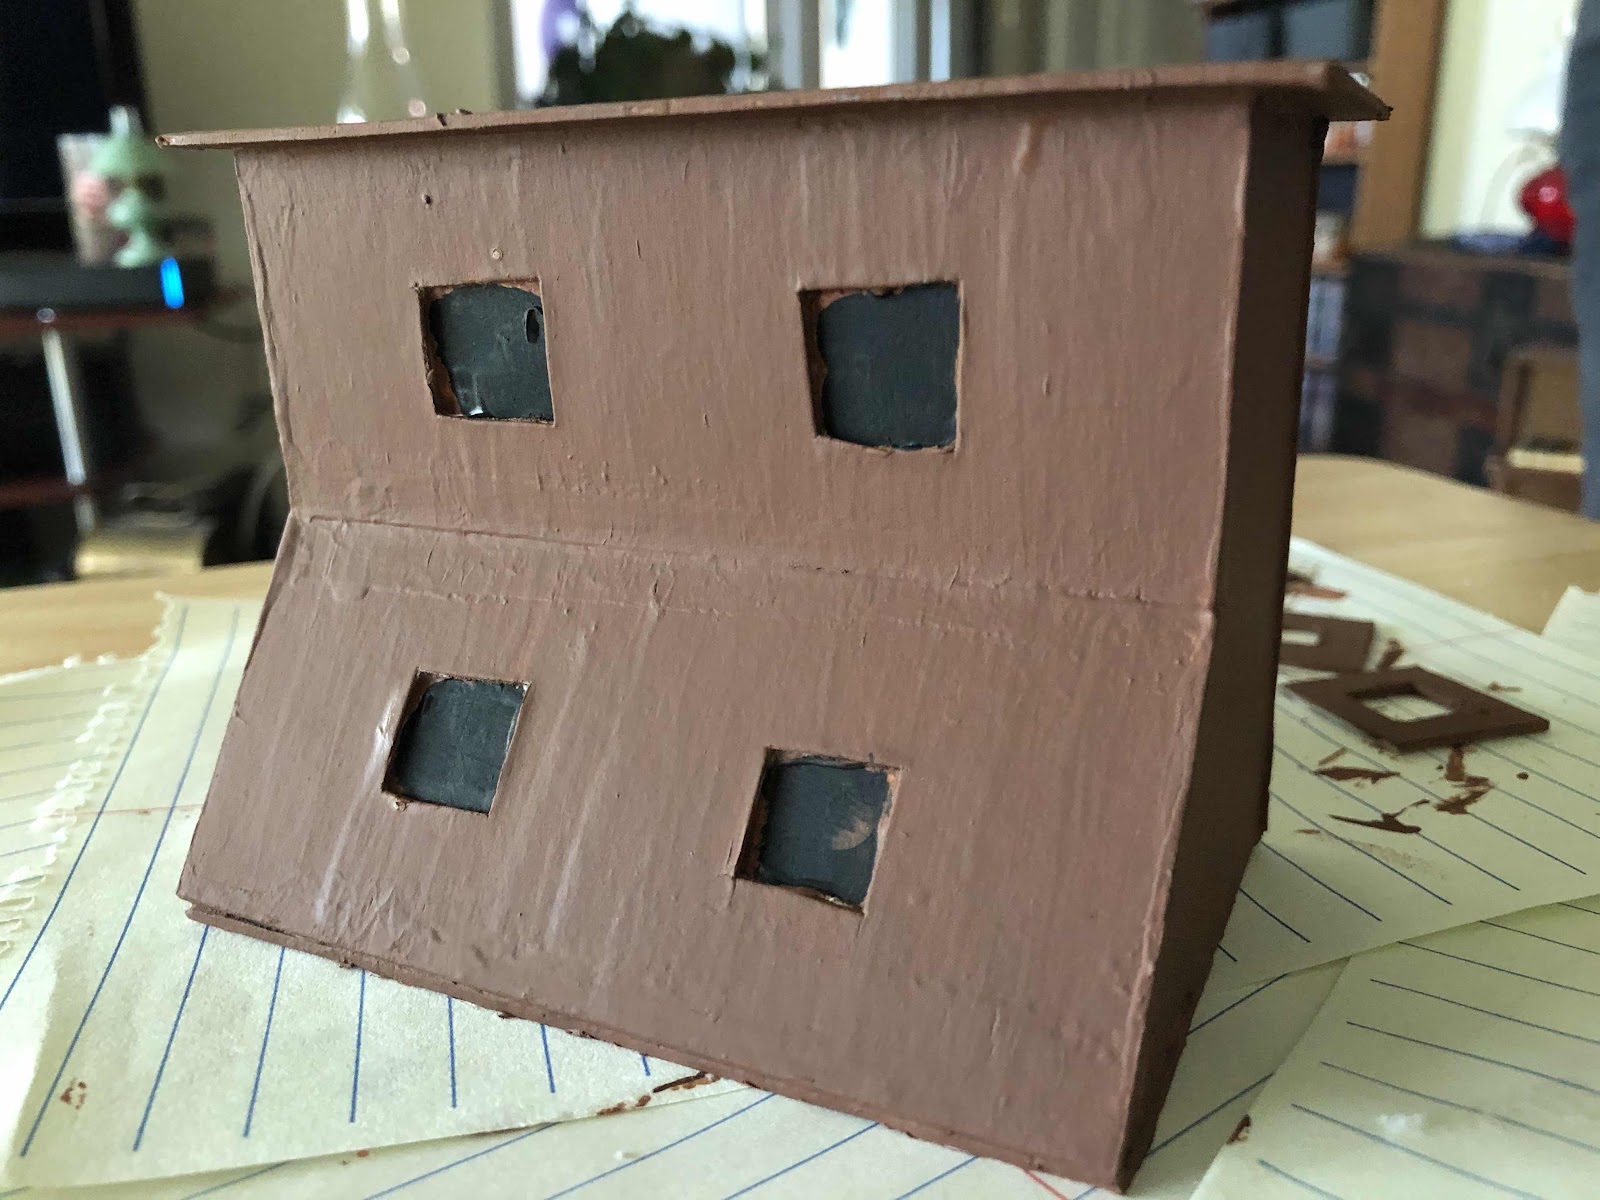
I measured the space where I thought the counter would be placed to get a rough idea of my dimensions and I sat down with a paper and pencil and drew out a rough sketch of the pieces that I would need to cut.   My sketches were not at all fancy, as you can see they were done on notebook paper and not anything special.  But it was enough to give me dimensions and an idea of the necessary pieces to cut.
I decided to use Mat board.  It is really easy to work with and relatively inexpensive. And make sure you have a sharp blade on your knife to get a smooth cut.
Slowly I started to draw and cut the pieces that I had sketched out earlier.

I made sure to label each piece as I cut it and eventually I had every piece cut.


It was time for the moment of truth and glue!   Did my measurements work?  Did the piece of furniture look anything like my inspiration picture?   I carefully glued my pieces together.  I did not put the drawer fronts on.  I  wanted to paint them first.  I knew that I was planning on putting small beads in the recessed areas and a little window on the front sections.  I knew that it would be MUCH easier if I painted first.

I chose to paint my piece in a brown paint.  I was trying to go for a wood grain.   I luckily had some brown paint in my stash, so I pulled it out.
And I got to work!

It took a couple coats of paint to make it nie and smooth and uniformly brown.
My last bit of painting was to paint the recessed areas black.  I wanted to give the allusion of more space behind the beads, so wanted it to be black.
From here the project was mostly done.  I just had to glue some small seed beads into the recessed areas glue a window on the drawer front and glue them in to place. I did attempt to make more of a wood grain.  It was passable for my first attempt.  I will have to work more on that technique for sure!

Overall, I am happy with my general store counter and can't wait to really put it to use in the stonehouse quilt shop!


Monday, May 11, 2020

StoneHouse Quilt Shop: spools of thread

While making a my quilt shop, I realized that I was going to need spools of thread.  A LOT of spools of thread.   I knew I wanted lots of different colors of threads!  I wanted this quilt shop to be a vibrant explosion of colors.   Sure I could buy something, but that is not the mission of this dollhouse.  This project is an attempt to creat everything from scratch and using items I already have at hand.  So I pondered for a bit and then I gathered my supplies.

All I needed were some q-tips, a variety of different colored embroidery floss, scissors and glue.   I was ready!

The first thing I did was to cut the cotton end off of the q-tip.   I found it best to just cut one end off to start.   I would be making about 5-6 spools from each q-tip and the second cotton side gave me a nice little grip/hand hold!

I then wound a bit of thread around the end.   I used a dab of glue to hold it into place before I started to wind and another dab of glue to hold the end into place when I had finished ‘filling’ my spool with thread.

After everything was nicely held into place with a dab of glue, (any glue works...I used tacky craft glue) I took my scissors   and snipped the q-tip  to disconnect the ‘spool of thread’ just a wee bit below the thread.  Seriously, I eyeballed this!

And voila.....we have a spool of thread!

I repeated this over and over.

And over ....

And over....

Until I had enough for my quilt shop.   Tedious, but so easy!!!

I decided to make shelves in my dollhouse to display my thread.  

I have plans to put make bins of white and black spools...those basic most used colors.  (Yes I made quite a few white spools and quite a few spools of black thread).  

It’s a work in progress, but these small projects are slowly bringing this miniature dollhouse quilt shop to life!!!!