Saturday, March 14, 2020

Log cabin tour

My very first dollhouse!   It was my childhood dollhouse that was carefully stored away until I was in my 40’s.   And that is when I pulled it out and actually realized my dream of completing an ‘adult’ dollhouse!

I set the era for this miniature dollhouse in the mid 1800’s.   It is a log cabin and essentially just a big room!   It was a natural for a rustic historic house! 

  Ok, and some of my fascination with making this a mid 1800’s build could have been my childhood love of the Little House on the Prairie books!  I’m sure that is where and why I built a rope bed with a trundle bed!   Afterall, Mary and Laura Ingalls slept on a trundle bed in the Big Woods!!!

I had a great time with this build. I learned a lot and fell in love with the hobby!!

So let me give you the log cabin tour!


Thursday, March 12, 2020

Forever Friends Dollhouse and Miniature store

We were not sure what to expect when we headed out for a dollhouse store about an hour away from where we live.  I laughingly said ‘this might be a bust!’  But we were ready to explore and were happy taking a drive, even if the end result turned out to be a failure.  

We followed the gps instructions to get to the shop and with each turn my heart sank.  This couldn’t be right.  There couldn’t be a store here!  And if there was, it was going to be one shelf of miniatures.  I was sure of it!   But undaunted we headed in.   We were ushered down the steps and the dollhouse lover in me gasped with delight!

There were 3 1/2 rooms of dollhouse goodies!   Wall to wall.  Floor to ceiling!  I was in heaven!!!!!

There was everything imaginable!

Of course I had to make a purchase...or two!
I already had the stool ..but I could have bought another one had I wanted it, she had them!!  But I bought the kitchen set!  (Amazon affiliate links)

This store is definitely fun!  You can tell that the owner loves the hobby.   She was more than ready to assist and help me realize my dreams for my dollhouse.  But even better, she allowed me to browse, explore and ohh and ahhh over all of the delightful miniatures!   

This store is amazing!   If you like miniatures....this place is for you!!!!  I will be back...time and time again I’m sure!!!

Monday, March 2, 2020

Building the Greenleaf McKinley

I have written about my experiences of putting together my very first dollhouse as I was working on the house.   It was a daunting task.   It was scary.  It was overwhelming.  It was a task that taught me incredible patience.   It was a joy and a pleasure to watch it come to life.  I will definitely be creating and building more in the future.   But right now, I want to reflect on the build!   So I have created a short video!


Sunday, February 23, 2020

Work slowly recommences!

Life certainly got in the way of this build....of all of my dollhouse making schemes!  But I have done some work and made some additions in the past few months on some projects.  I am vowing to be more committed this year...and my hobby of dollhouses is one area.  I love it, and am vowing to not life get in the way again!

So what has been happening.  Let me break it down for you by current ongoing projects.

Stone House Quilts:
 I got rolling on the stone for the Quilt shop and then a pinched nerve ended that task for a while.  I tried to wait it out, but eventually packed up the house for a while to let my body heal.   It eventually came back out though and in fits and starts I managed to complete the stone walls.


 I also managed to get the interior painted!  It has been a SLOW process!   I am currently working on laying the 'hard wood' floor.

 I am more than 3/4 of the way completed and I hope to start sanding this week!


The McKinley:
I tried to make a crib, but I was just not liking the way it turned out.


 I haven't give up yet...but when I saw this crib in an antique shop...I couldn't resist!

Jason gifted me with a fabulous piece for the upstairs hallway. I loved my Christmas gift!!!  And it fits perfectly!
 Ove my birthday weekend away, I found this set at an antique shop.  It is a bit more Victorian than I would like, but it is working nicely for the time being.
I am also working on creating some videos to complement this channel and to make a visual memory for me to document my work, my growth and my creativity.  I am constantly learning each day.  I can look at my Mckinley build from just a year or two ago and see things that I should have done to give it a more polished look.  That is the beauty of this hobby.....it is a place to constantly be learning!

Tuesday, May 28, 2019

Work commences on the Quilt Shop

I finally decided that it was time to start working on the dollhouse that I picked up about two years ago.  I found this house at a flea market/antique store and decided to buy it.  I knew it needed a bit of work when I got it, but I was undaunted. I sat and looked at it a while for the plans to take place in my mind.  This would become ‘The Stone House Quilt Shop’.  It has sat in storage since the plans were made.  This last weekend I decided it was time.  I pulled the house out of storage.

Now let me be clear, the McKinley is not complete.  I am still working on the nursery and have lots more to do before that dollhouse can be labeled as anything close to complete. But can’t a girl have two works in progress?

The Stone house quilt shop is actually a Greenleaf Laurel. It was built when it came into my possession. 

I immediately worked on fixing the porch...it was quite weak!  I also took off the loose trim.  This dollhouse was put together with a hot glue gun....and it shows!  Most of the joints needed to be reclined properly!  That was my first order of business!

While the porch and trim are going to remain white, I wanted to give the white a fresh coat of  paint.  Easy and quick!

The next thing I did was to paint the house light gray!  
This is to work as a back drop for the stones that would soon be placed on the house.  The gray would resemble the mortar as it peeka between the installed stones.

I chose to use cardboard egg cartoons as my stones.  I ripped the heavy paper into small ‘stones’ and placed them into a bowl.   

I then spread glue on a small area of the painted gray area on the dollhouse. Carefully I placed the stones in place on the glued area.  I took time to make sure that the stones looked like they fit together.  

Slow and steady progress.   Small sections of the house done but by bit.  But slowly the dollhouse actually became a stone house!  I was giddy with excitement!!!!

I have a pinched nerve...and ‘stoning’ the house was a tough painful job.  I made it half way around the house....and my arm decided that even doing a bit here and a bit there was too much.  So progress is halted....hopefully just for a day or two!!!


Monday, September 10, 2018

Flooring

I got the bug the other morning after my post breaking the silence.   

I starred in on the sanding of the main bedroom!!!

I think that it’s looking really good!!!  You can see the sanded floor and the I sanded floor on the level below the sanded floor in this next picture!!


I also started working on the hallway.  

I added wallpaper first.


And then I worked on laying the floor!


Obviously trim work needs to be done...and I have one more small piece of flooring to lay on the left side of the picture.    But it’s coming along!!!

I am also thinking of making this for my kitchen..above the sink!!!


So finally...some progress!!


Saturday, September 8, 2018

Quiet but not forgotten

Wow!  Has it been a long time or what????   

So much had happened since I last posted on here!  And most of it is seemingly unrelated to my dollhouse....or so it would seem. So let me get that out of the way and then I will share the little that IS happening in dollhouse land!!!

My last post was mid July of 2017.  The very first week of August I began a new job....55 miles from home.  An hour commute you might say?  No...rush hour city traffic made that drive 2-3 hours every day....each way!  By the time I got home, ate dinner and saw my fabulous boyfriend for 15-20 minutes  (the one that bought me the McKinley) it was time to say goodnight and go to sleep. Where was dollhouse time?  Yeah, there was no time for dollhouses!

In March of this year, my boyfriend and I moved toward my work a bit...it cut my commute down to an hour each way (an hour and a half in the morning...go figure). I carefully packed the dollhouses and gently moved them to their new home...one at a time in my car!  Everything arrived in one piece and I enjoyed setting them back up!

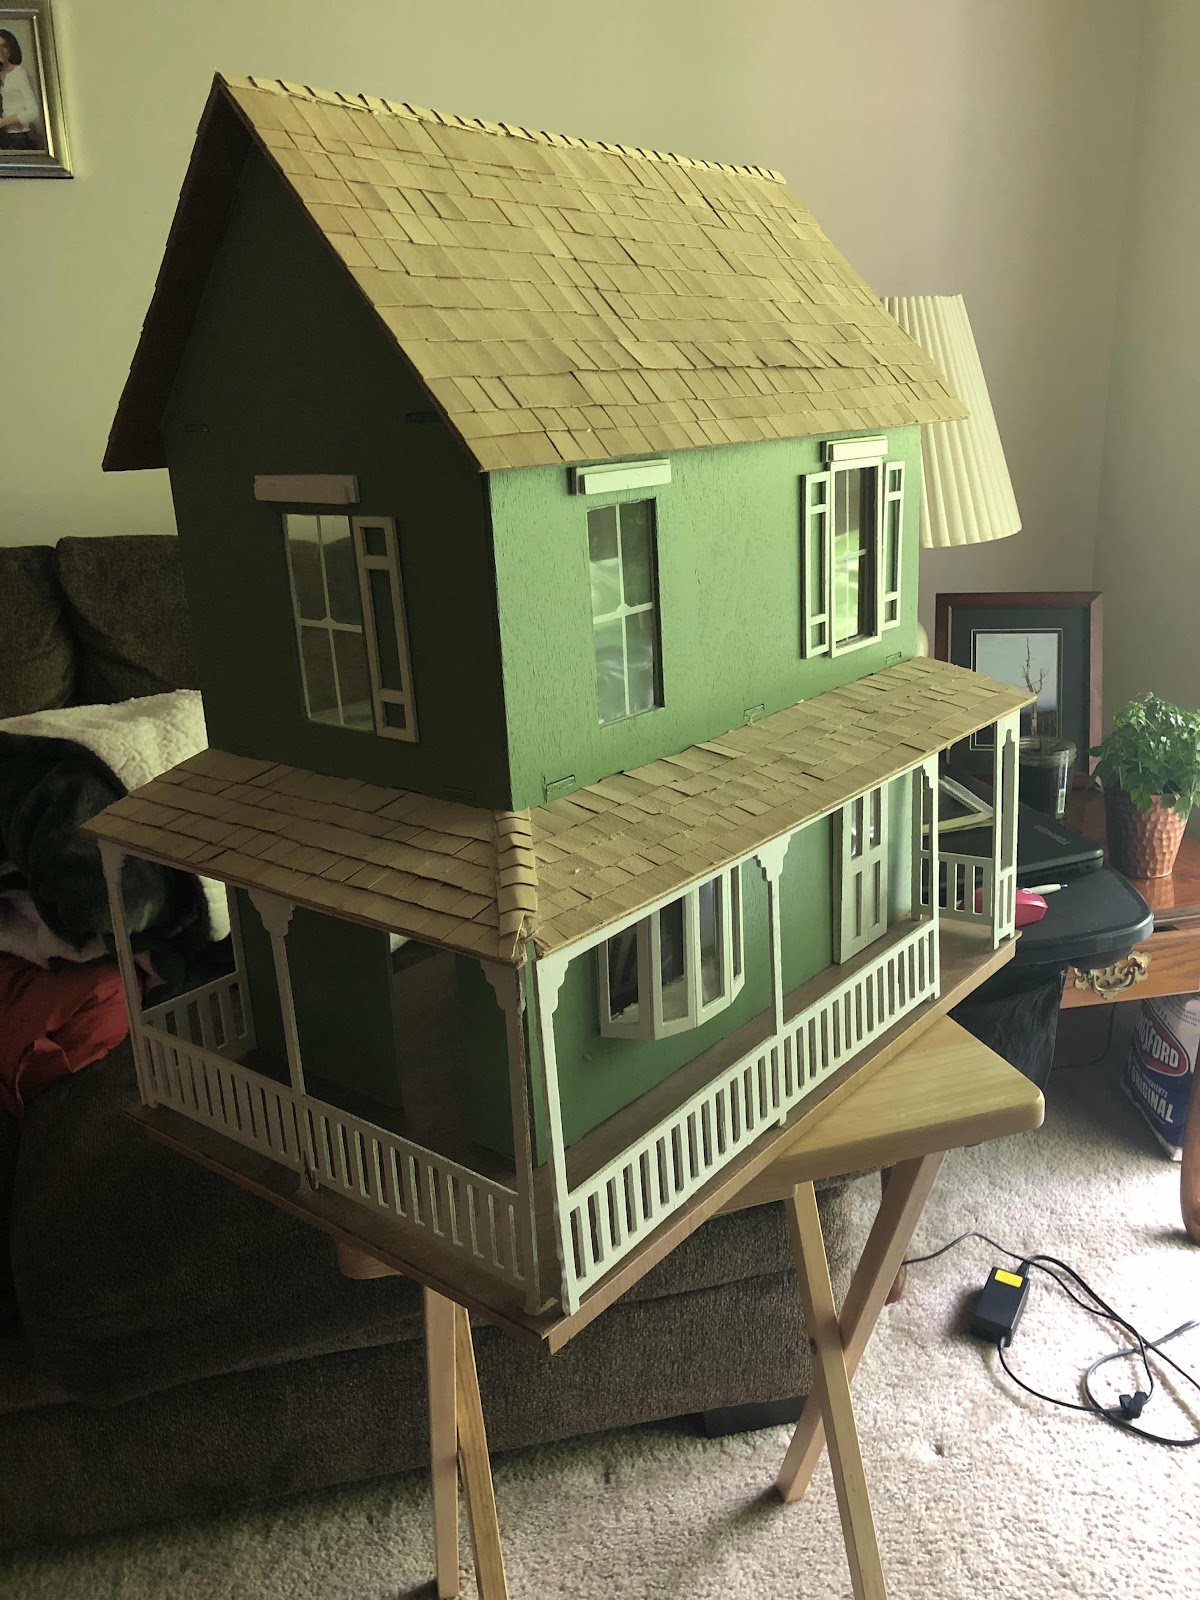
Once we got settled,  I started to think more about my dollhouses again!  The kitchen and bathroom of theMcKinley  were mostly done so I turned my attention to the ‘master’ bedroom.  

Just for reference...

The bottom left room is the kitchen and the bottom right room will be the living room.  

The second floor is divided into three.  The left room is the bathroom, the middle area is a hallway and the room on the right will be set up as a child’s room/nursery.

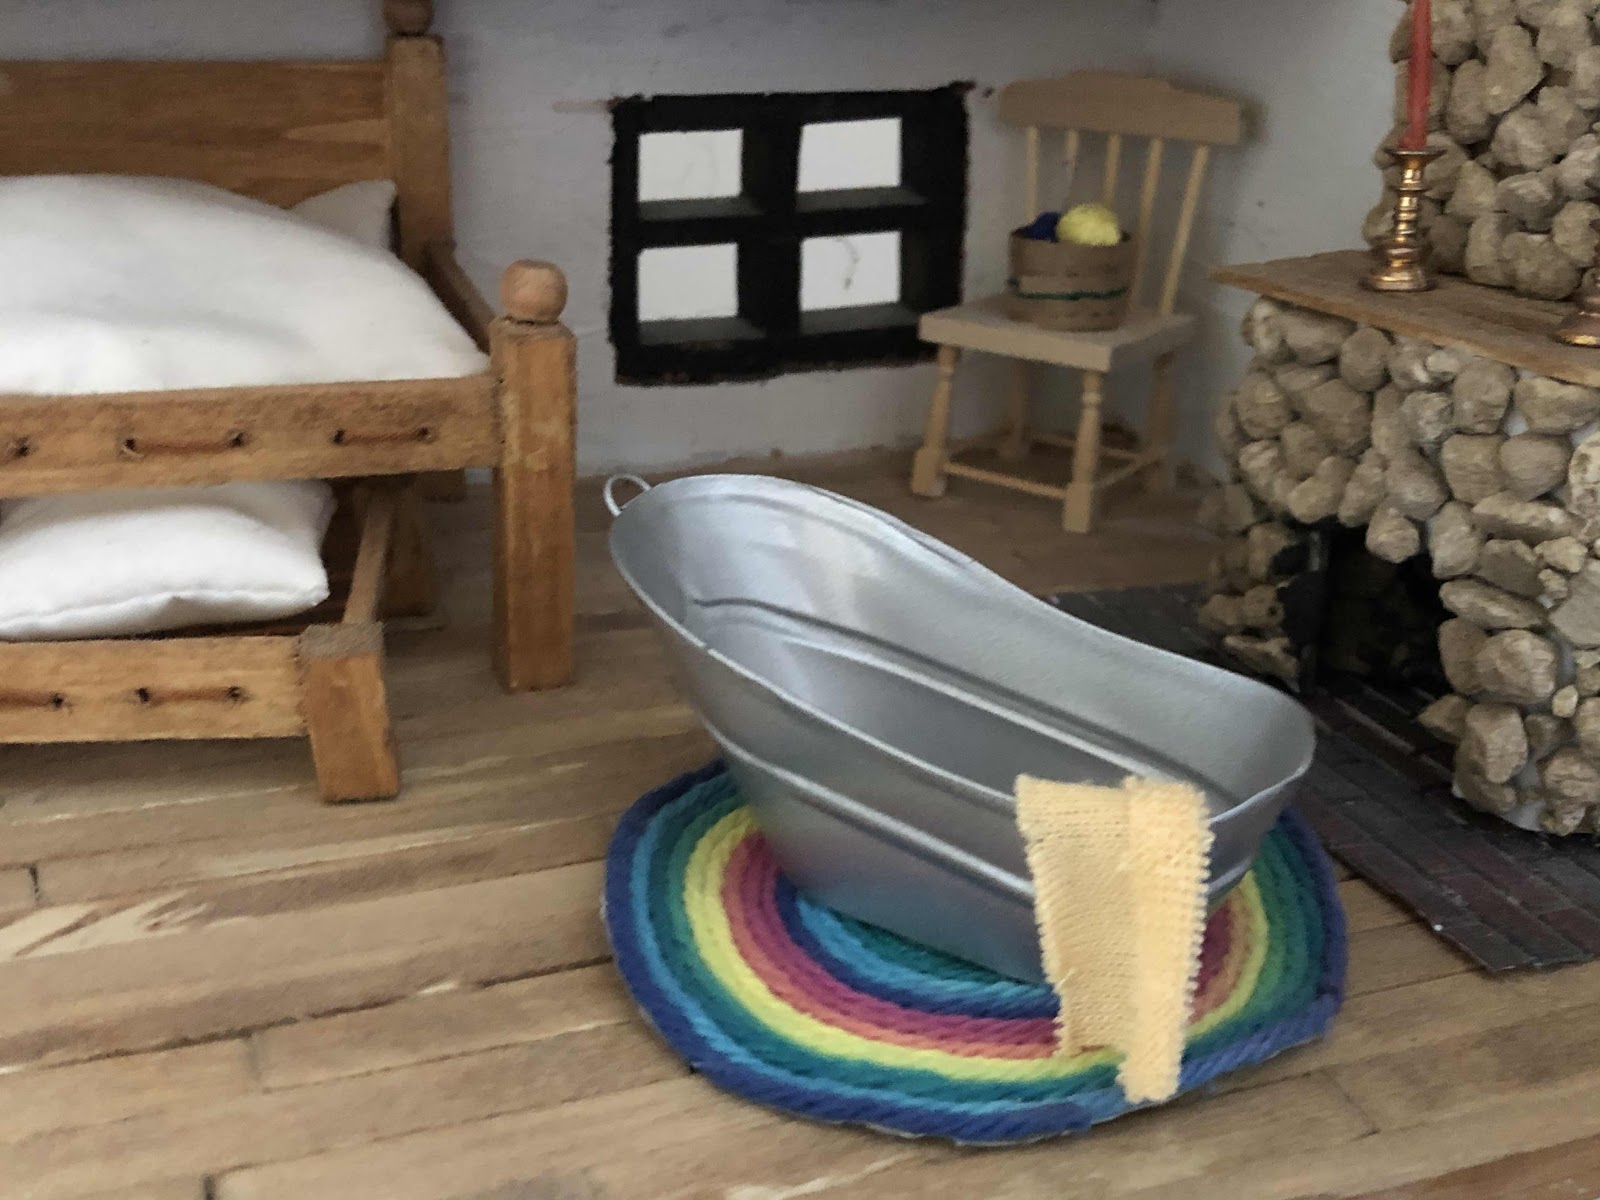
The attic level is also divided into two...(three if you count the turret.).  The small attic area on the left will be a typical attic/storage/junk area that I’m looking forward to stocking with this random little things that will make it a treasure trove to look at...For example found the most adorable pair of crutches that I just had to buy!!  The larger attic room on the right will be the master bedroom.  I’m not exactly sure what the turret will be yet.  I’ve toyed with lining it with bookshelves.  I’ve thought about making it a sitting area and also a small room for a crib/cradle.  Only time will tell.  

So after we moved, time opened up...a wee bit! So I purchased some things to recommence work on the McKinley.

I bought some craft sticks and a small saw and mitre box. 

I have most of the furniture for the master bedroom so I began there.  I  found some ‘wallpaper’ (aka scrapbook paper) that I thought would look nice as a bedroom.  And with my supplies handy I headed into the master bedroom.

The first thing I did was close off the small ‘crawl space’ between the master bedroom and the attic space.  It just didn’t flow with my ideas.  It was too short to be considered a door...so I opted to eliminate it.  So yes, in this manner my third floor technically has no point of egress.  That’s ok...it’s my dollhouse world and I make the rules!

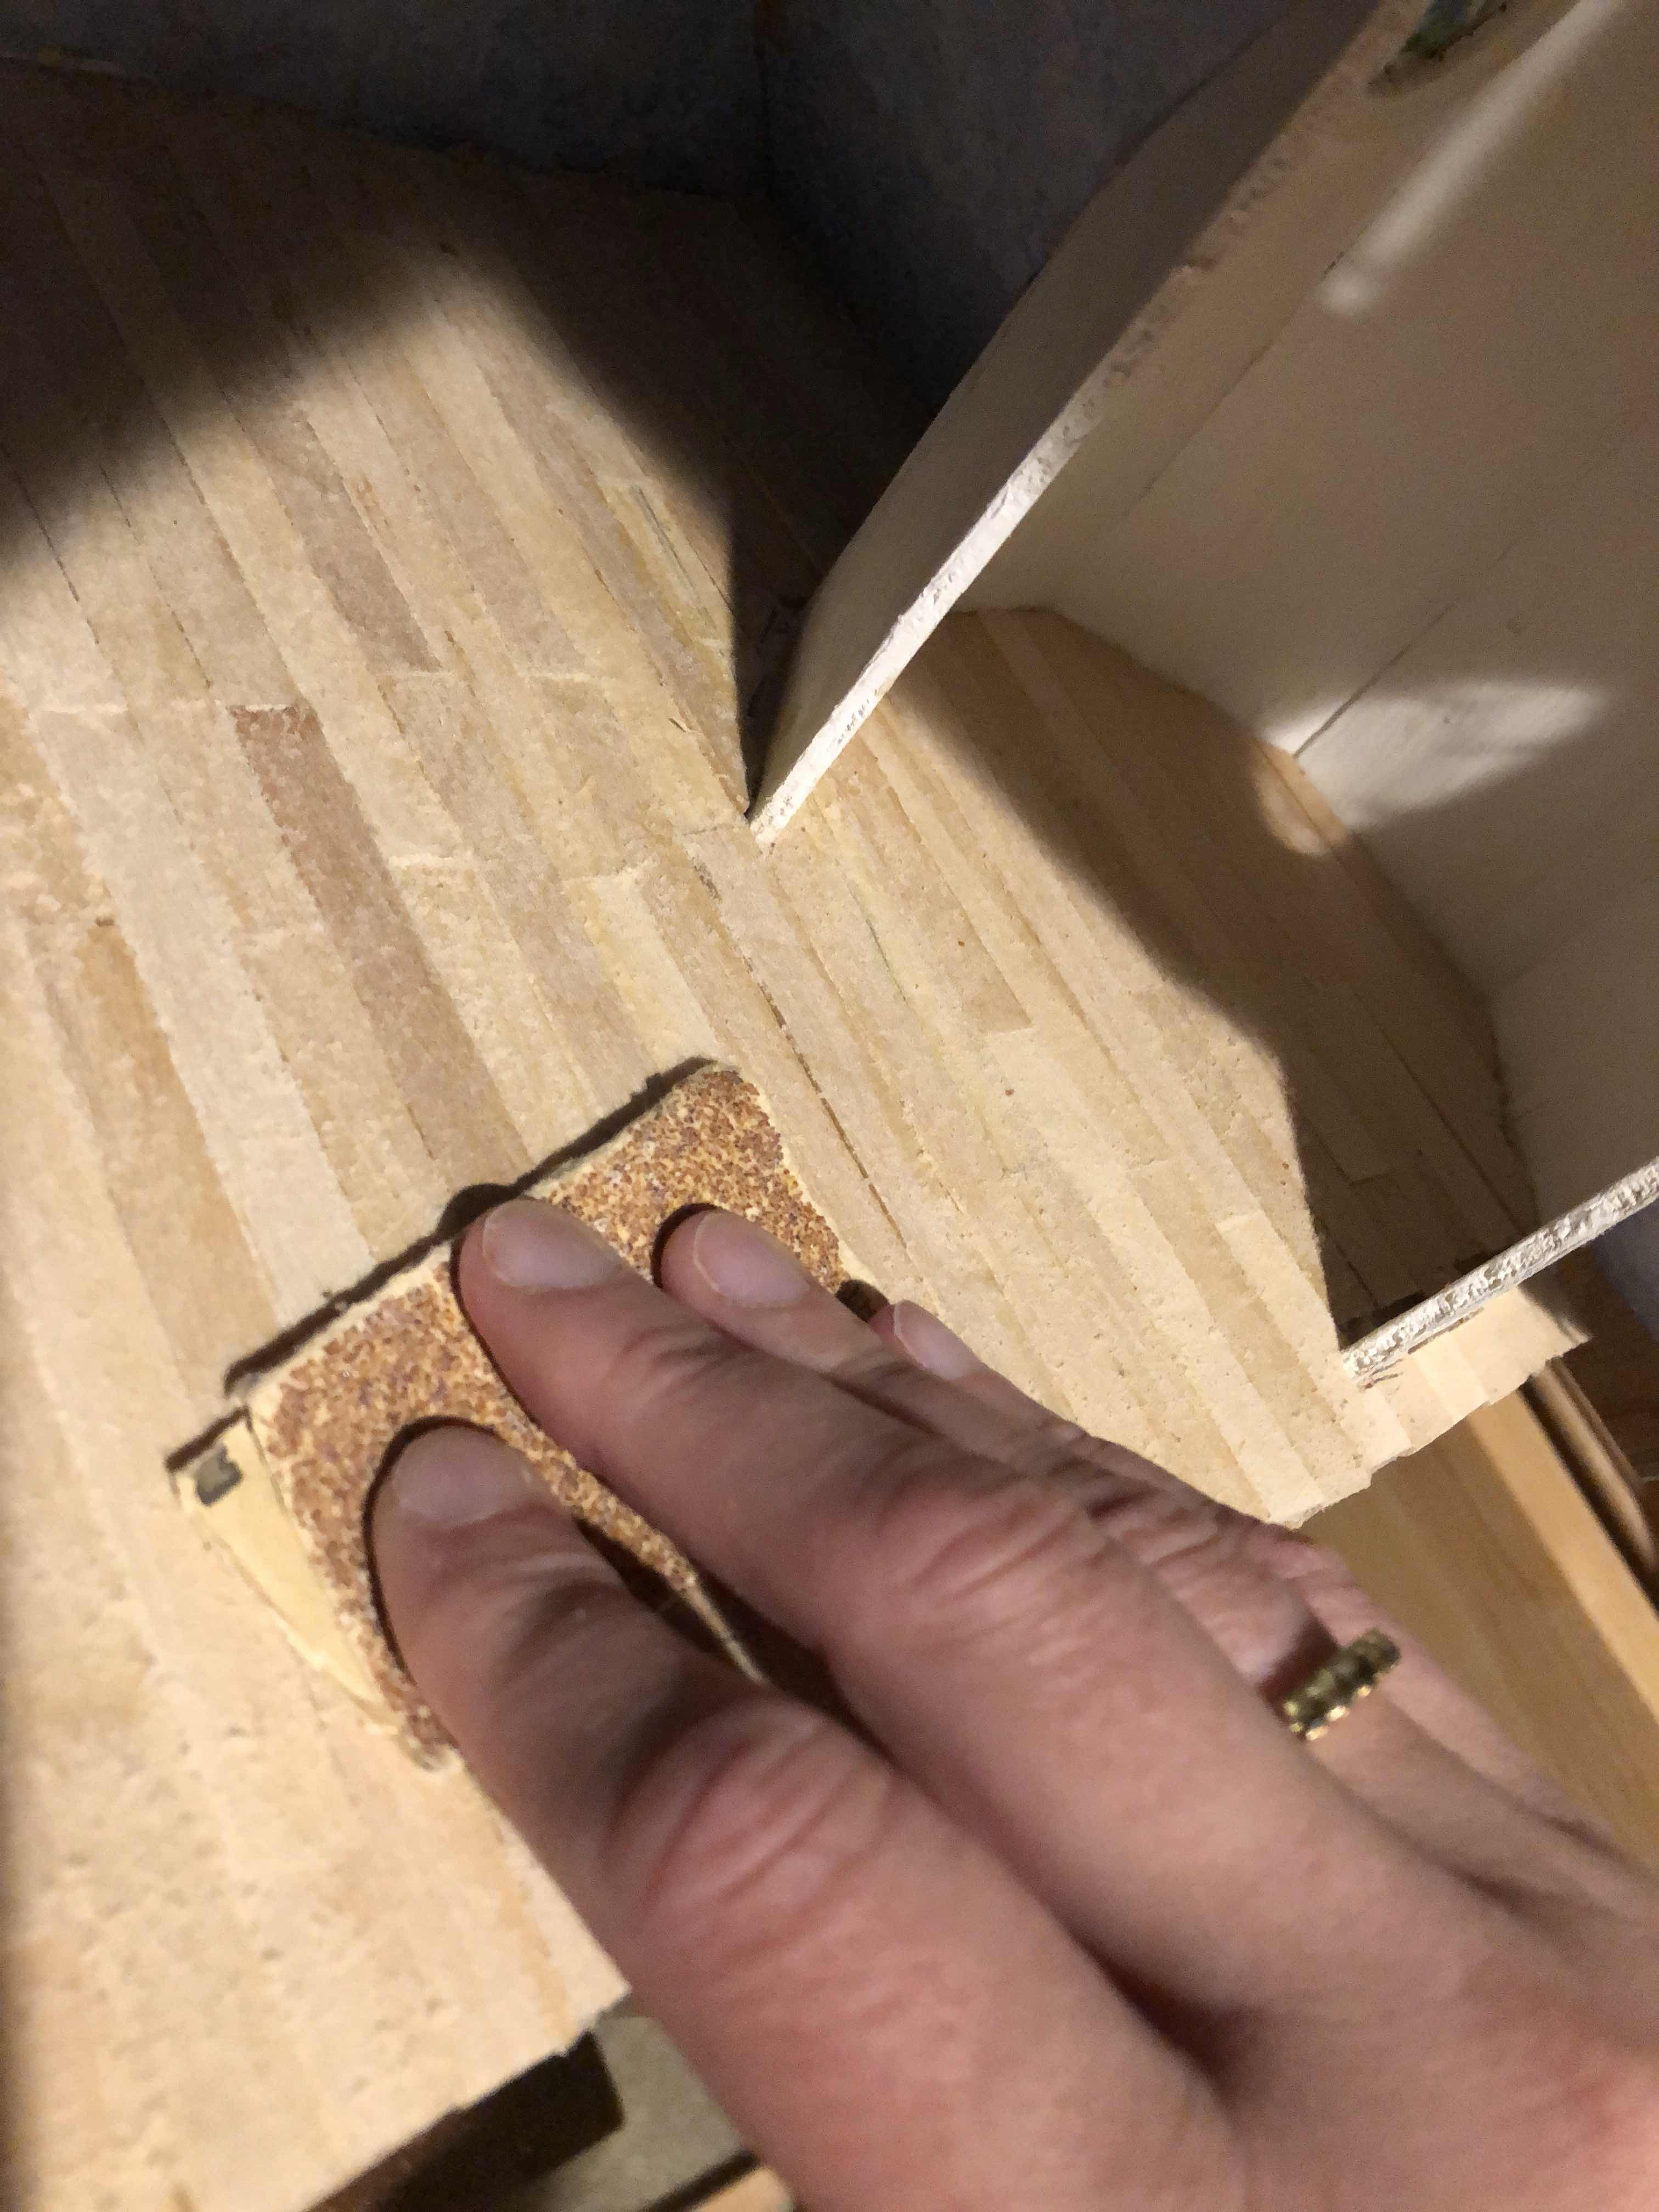
I then papered the walls.  Once that relatively easy job was done I began the tedious job of cutting and laying the hardwood floor, aka craft stick floor.   It was tedious and time consuming.  Especially as I came to the turret area and the many angles!

In order to have the time, I worked 15-20 minutes here and there. 

And finally I can say that the floor in the master bedroom is completely laid.  

Next step?  Pulling out the Dremil and sanding and polishing that floor in preparations for staining.

Oh yeah...It may only be 6AM but I’m raring to get out there and start sanding!!!!